
Beacon Academy RWBY Tutorial

MATERIALS USED:
A little white suiting fabric (to match blouse for the fake sleeves)
Vest (note it is black)
Ruffled Lace Trim
1 1/4 yard of white lining for petticoat
Black Tights
3/8" red satin ribbon
About a yard Yaya Han Gold Taffeta (you will be making biased tape with this fabric). I got a yard because you essentially cut it on the diagonal. You could get less if you wanted (like half a yard could work... although if you do then you'd definitely have to sew your pieces together)
Interfacing
Red biased tape
Button covers
x2 small black buttons (for the fake pockets on the blazer)
Simplicity Cloak Pattern 1771 (if you are doing Ruby)
Let’s get started!
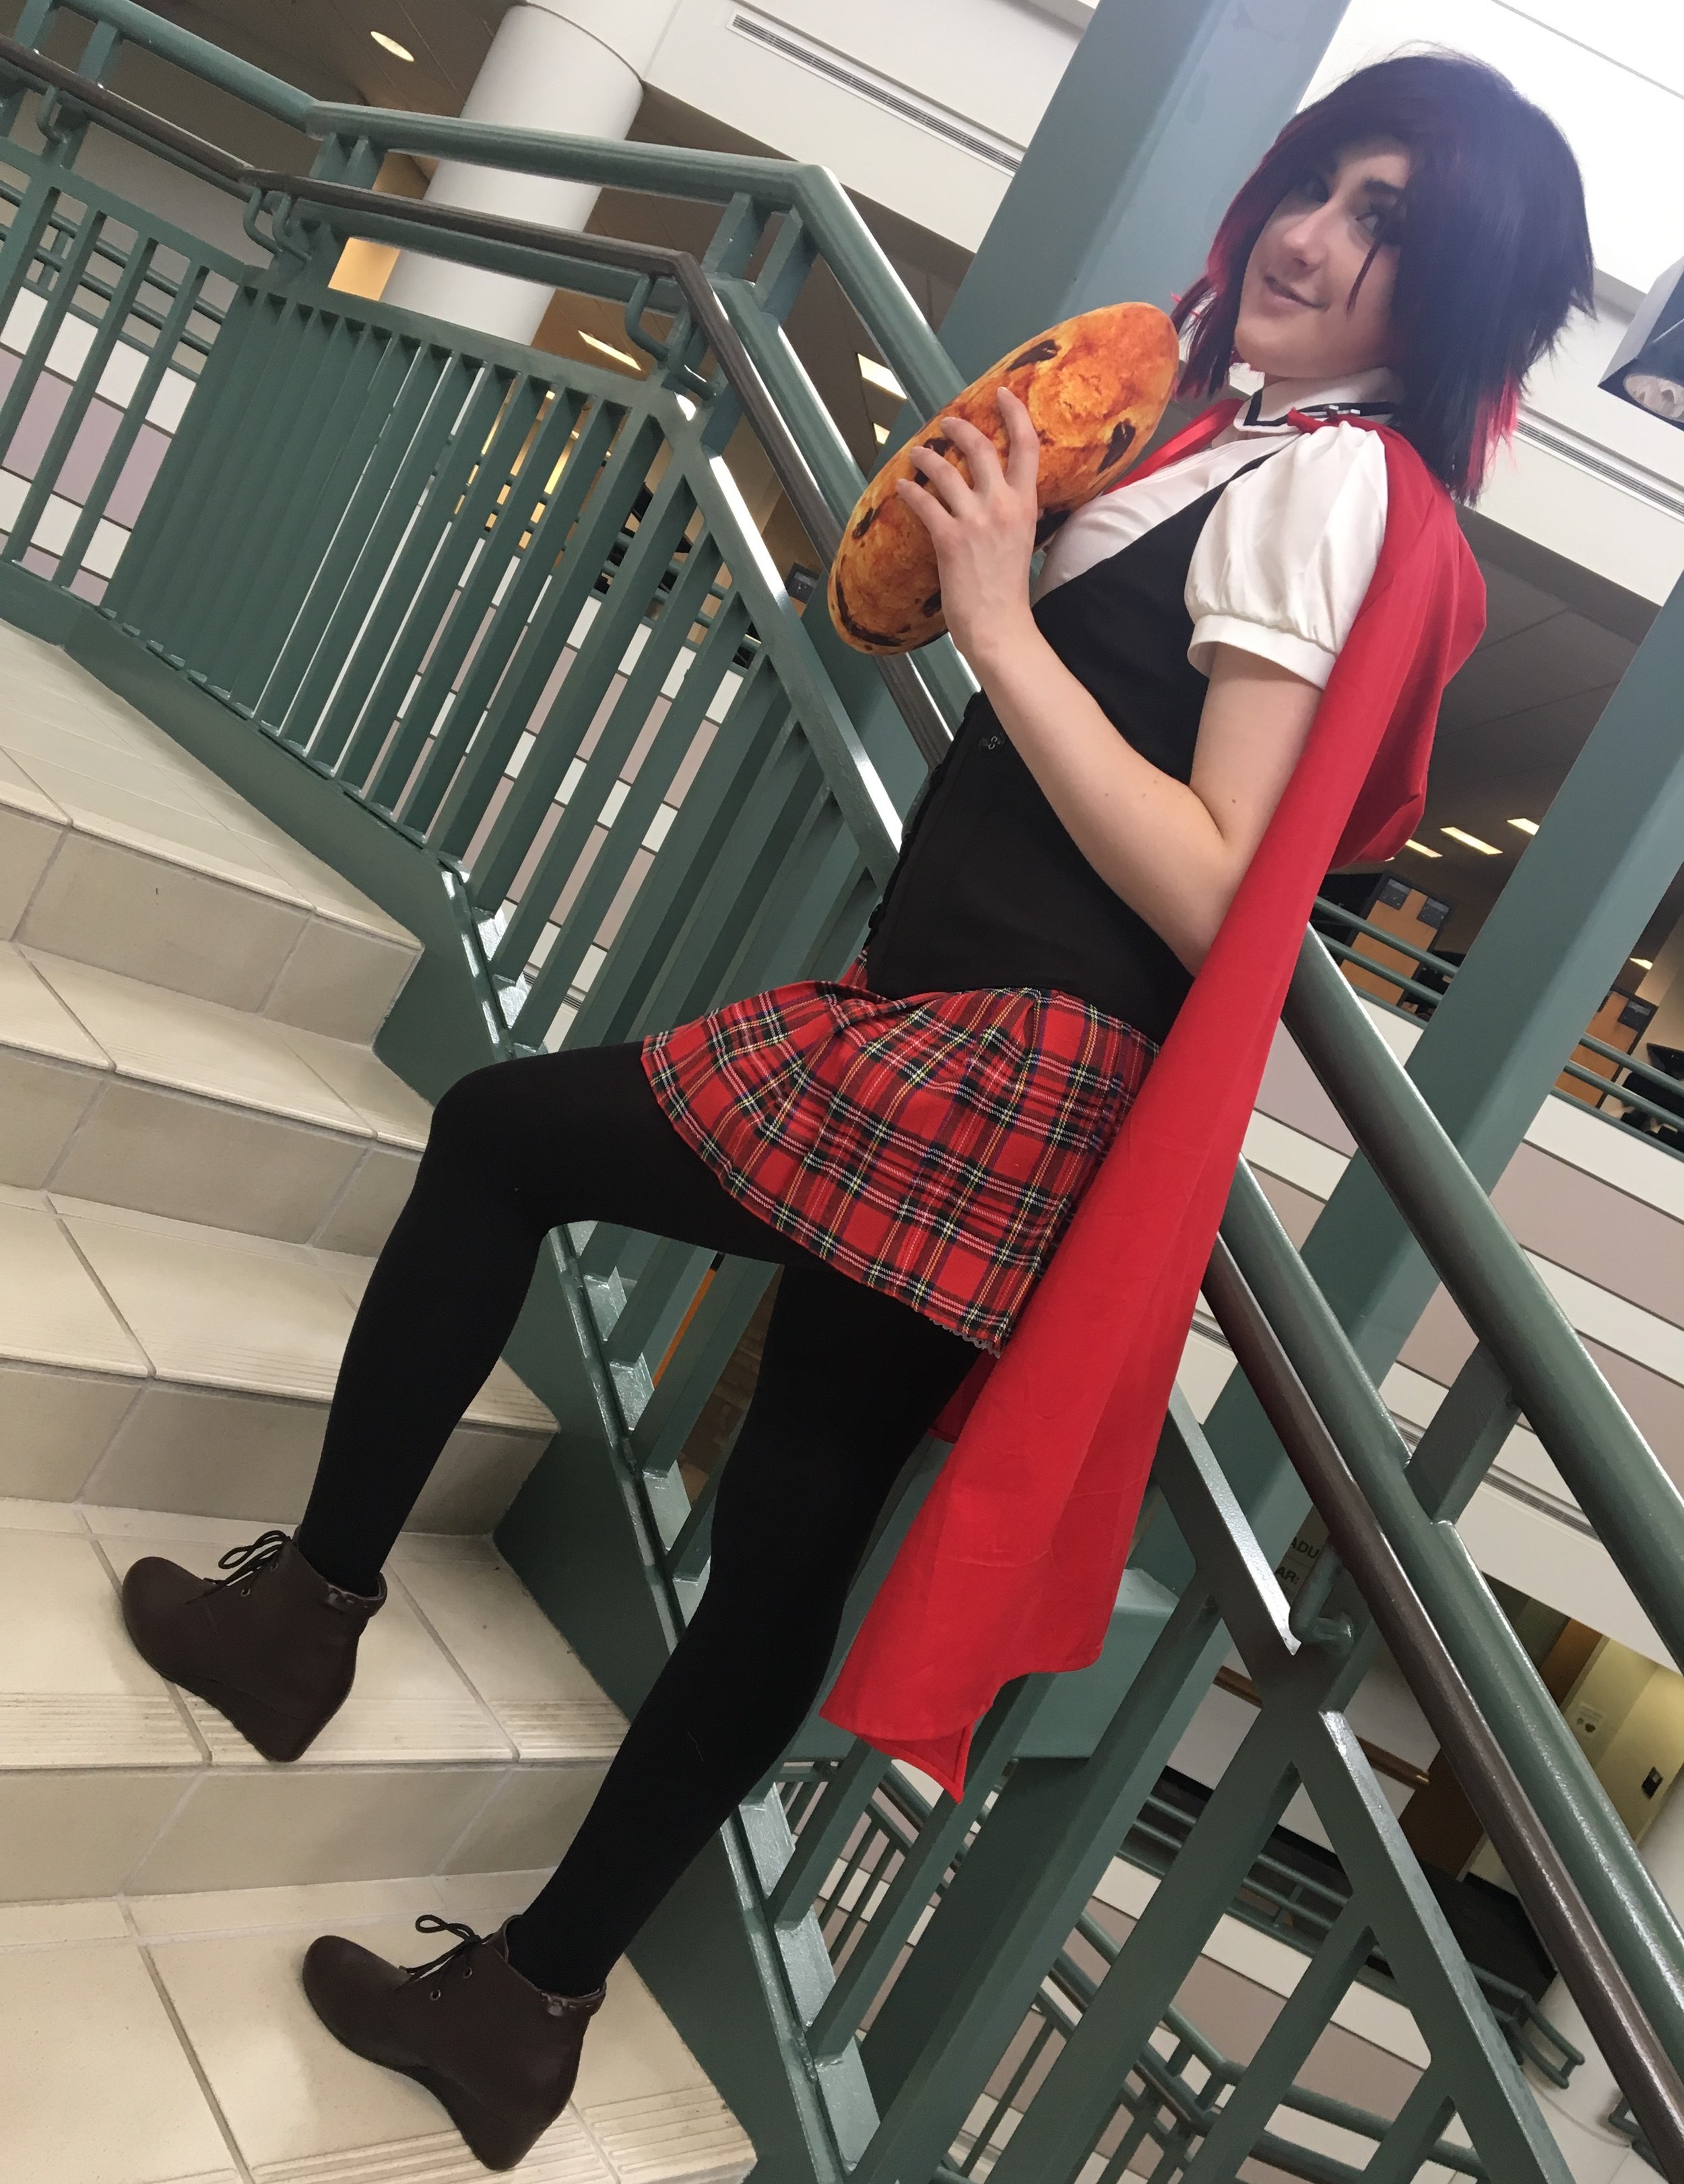
I understand everyone has different skill levels so I've made this easy tutorial on how I made my RWBY Beacon Academy outfit + Ruby cape for you fam! This tutorial has many pieces that are modified in different ways and includes some bought pieces.
Before we move on - I do want to remind you guys.
ITS OKAY TO BUY YOUR COSPLAYS.
ITS OKAY TO MODIFY YOUR COSPLAYS
AND ITS OKAY TO MAKE YOUR COSPLAYS
Don't let anyone tell you otherwise.

BLOUSE (Modified)
Yes - its short sleeved. I know that in the show its supposed to be long. But lets be real... you don't want to sweat your butt off at the next convention you go to (especially if that convention is in a really hot location......... like RTX)
Anyways what you need to do is grab your black ribbon.
Pin it about a 1/4 of an inch away from the edge and tack it into place.
There are many ways you can go about tacking it. Either take it through a sewing machine and sew both sides down, handsew with a slip stitch, or glue it down with fabric glue.
Personally I like handsewing because with a slip stitch you can stitch it so that the thread cannot be seen on the other side of the collar (not like it really matters but.... I'm a perfectionist).

SKIRT (Modified)
The skirt is cute - but its missing something..... A petticoat - which is essentially 3/4th of a full circle skirt with lace at the end to give it a little more detail.
Whenever I make circle skirts I use this website.
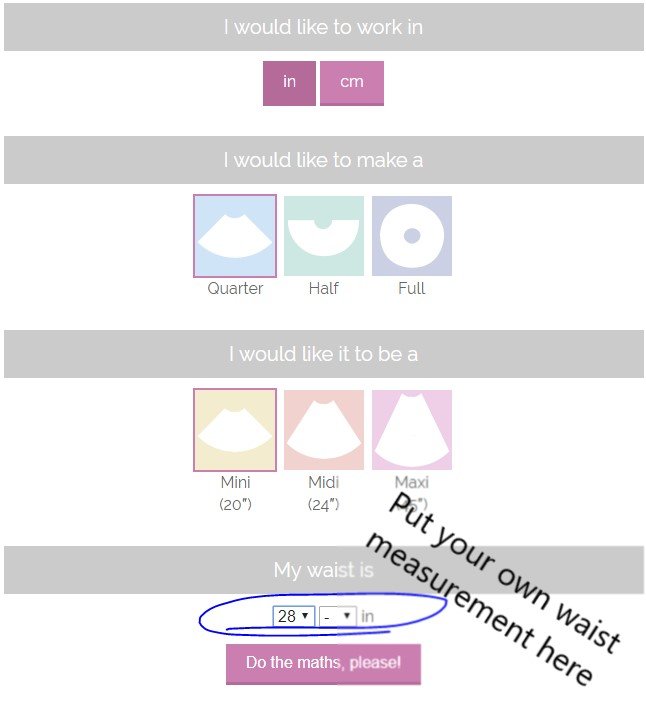
You want to choose QUARTER, MINI (note we will be making it shorter), and put in YOUR OWN waist measurement. Finally have it do the math and it will tell you how large your radius needs to be.
Transfer pattern onto paper. (I like recycling my old homework)
Don't forget to make skirt slightly shorter.
The length should instead be 15".
That includes a 1" seam allowance for both the top and the bottom.
Once you have your pattern you are going to cut out 3 of them on fabric then sew them together. The reason why its only 3 and not a full circle skirt is because
You don't want to over fluff the skirt or you will lose the pleats.
When I originally built this petticoat I didn't buy enough lace trim and didn't feel like going back to JoAnn's. Reasons why you only need to use the entirety on ONE trim roll.
When you get your 3 pieces sewn together to form a skirt.
Although be aware... that you need to be able to put the skirt on. So for when you are sewing the last two together. Leave 7" of the top OPEN. Don't even think about sewing it.
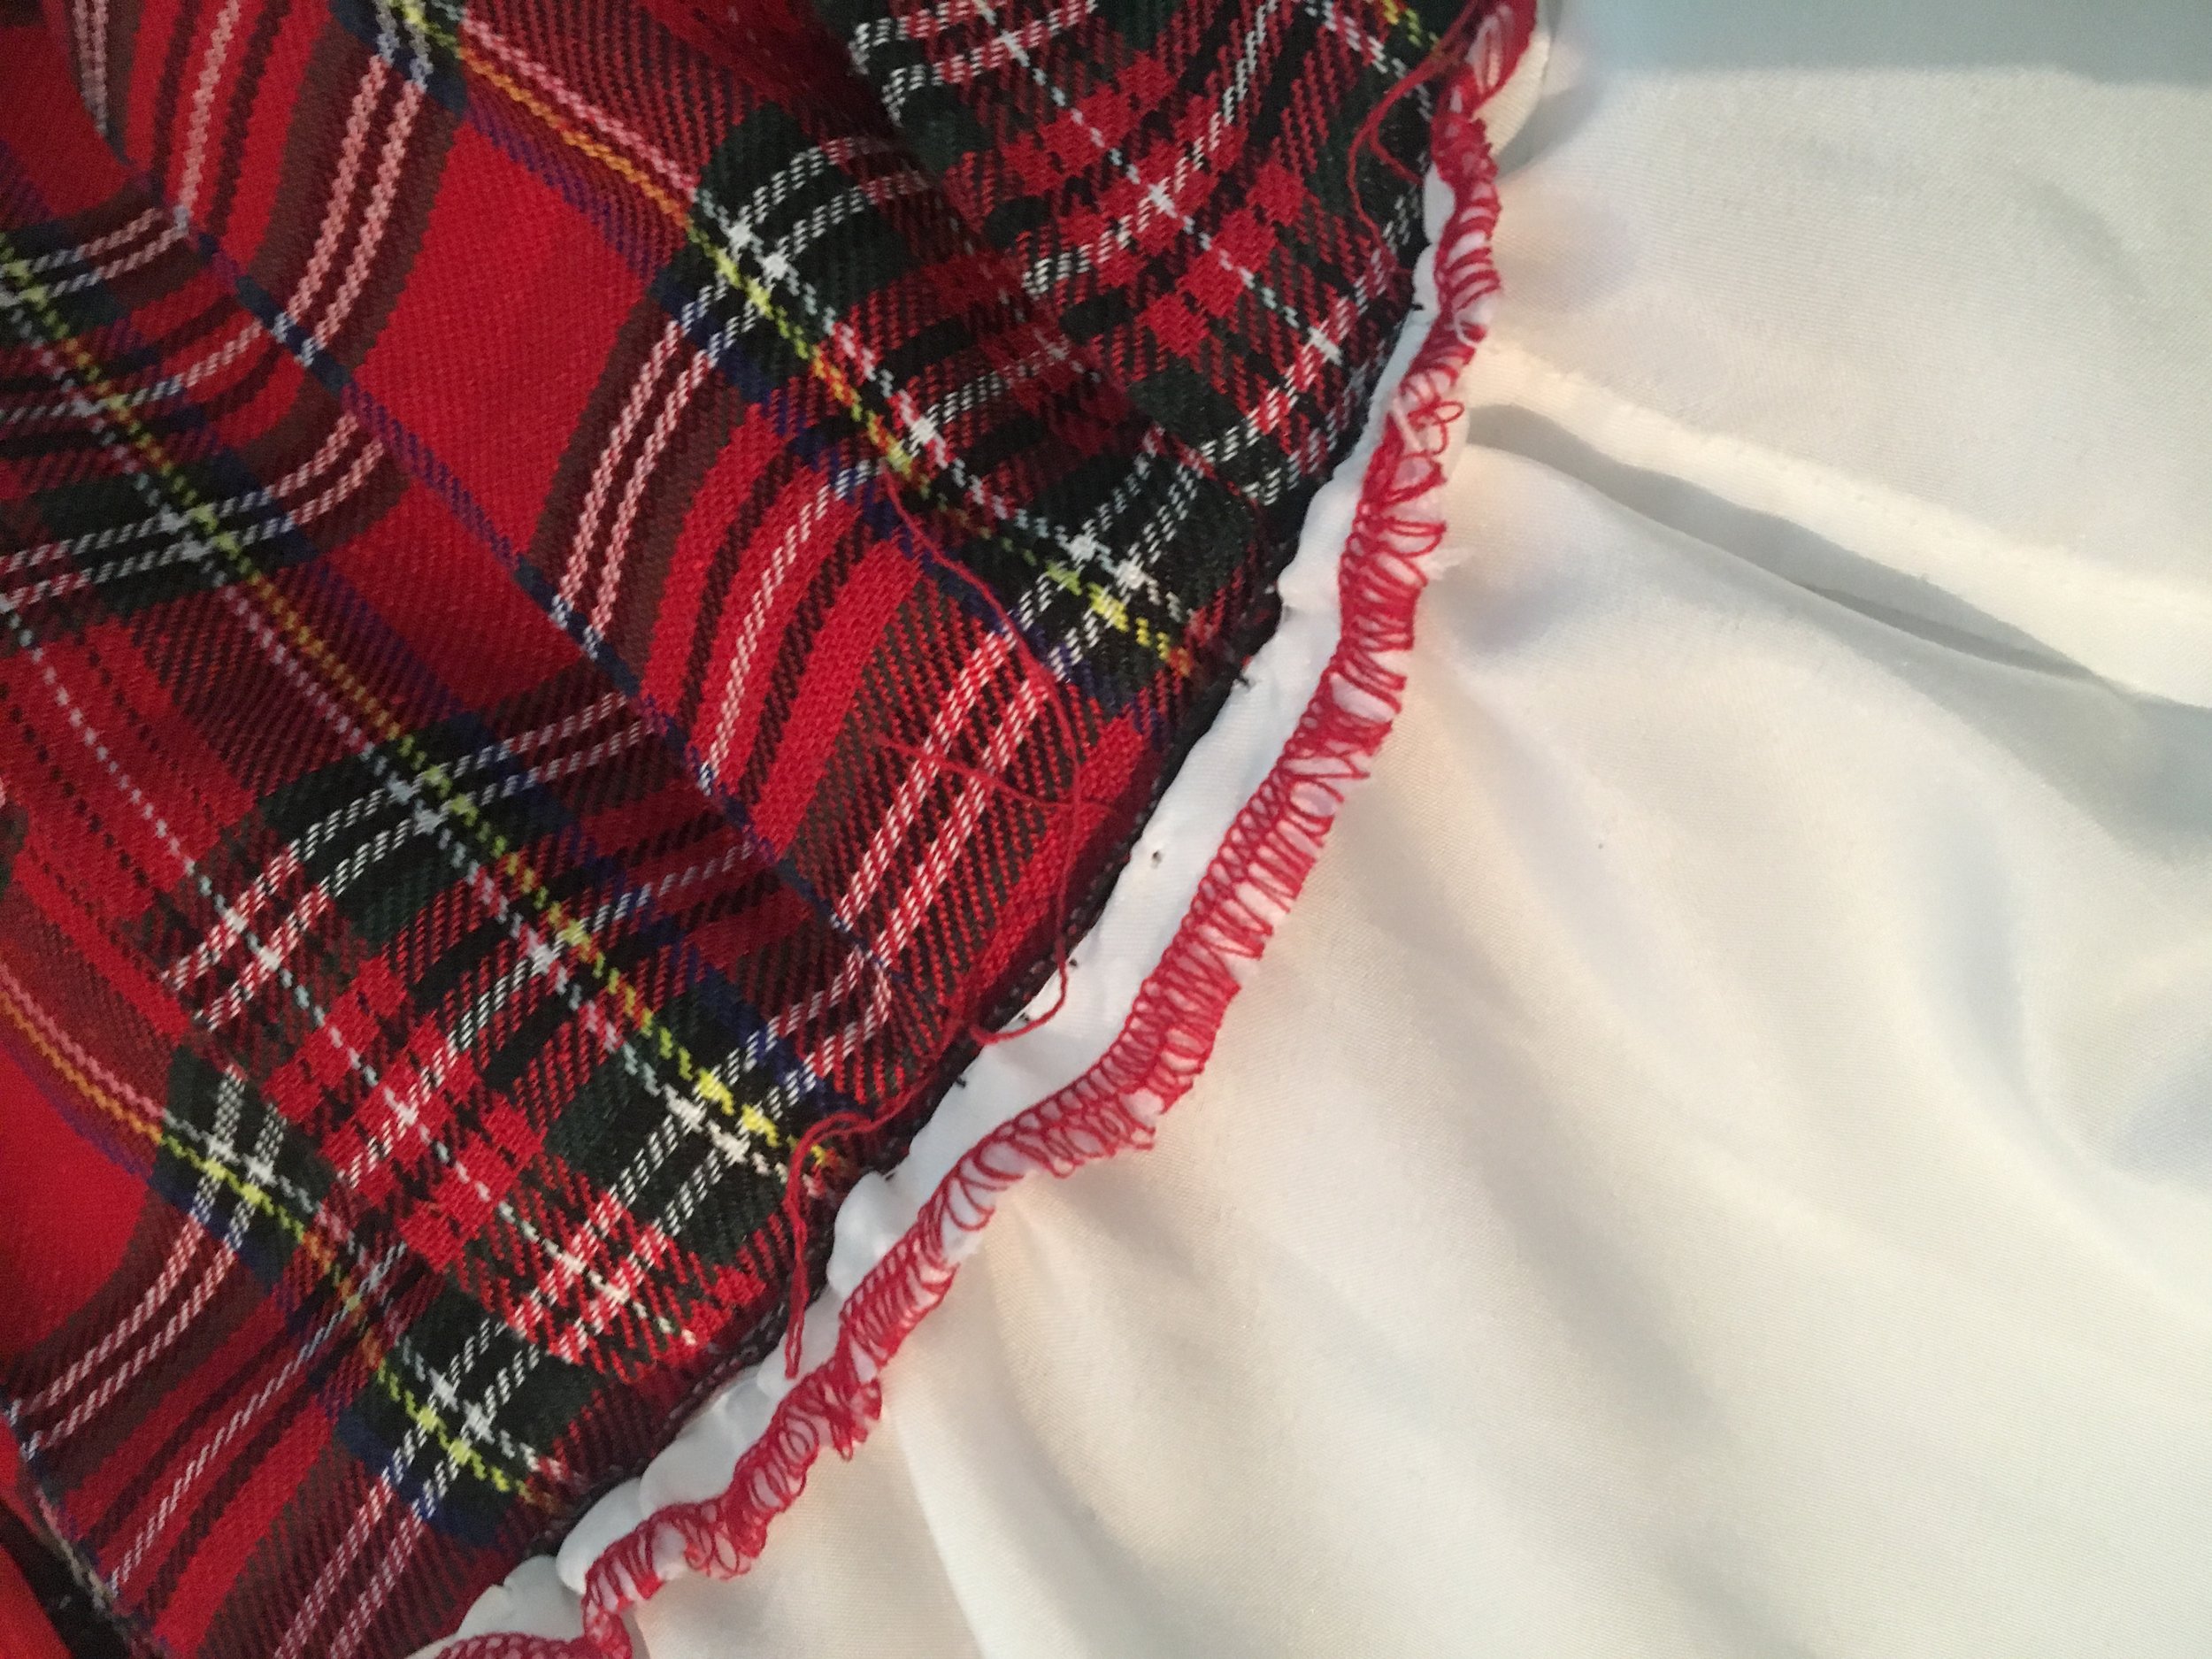
Lets start roll hemming the bottom! - don't know what a roll hem is? See the photo below
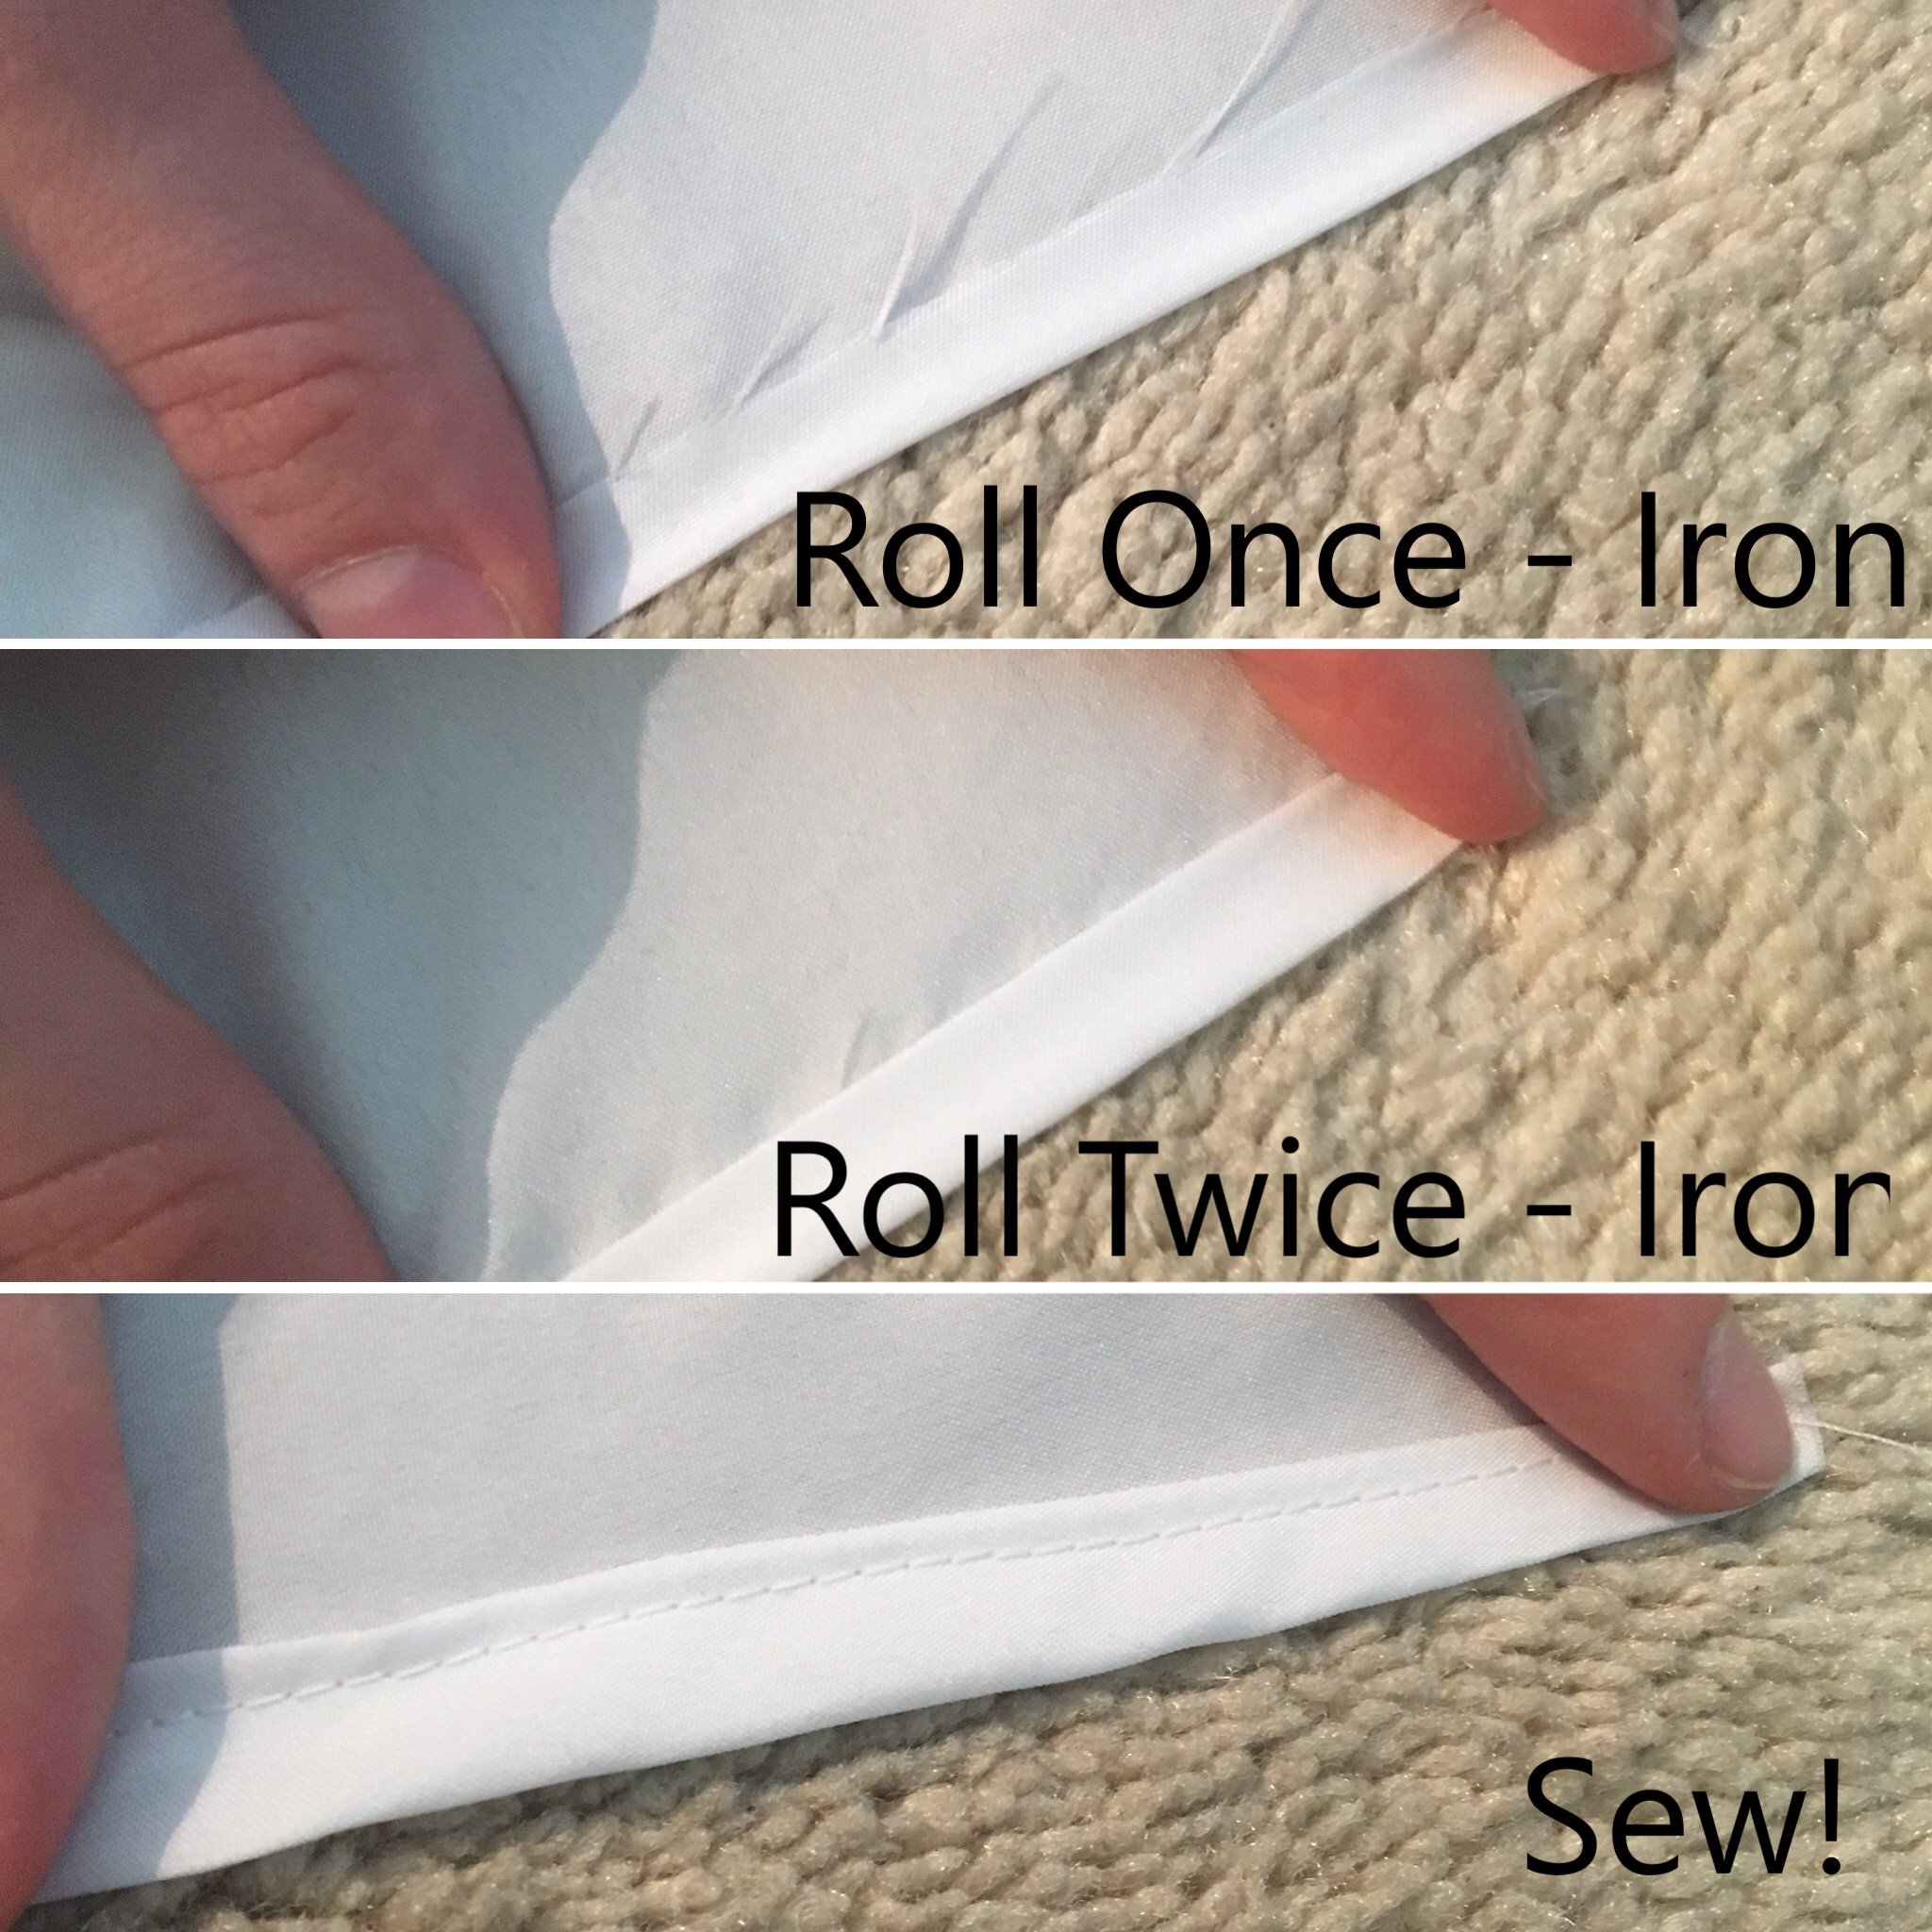
A roll hem is a way to finish off an edge. Essentially you will want to fold back about half an inch of fabric. Iron. Then fold another half an inch. Iron. And sew along the top. Iron.

Once you have the edge prepped. Lets get to sewing the lace on.
Pin it to the edge and sew on a zigzag all the way around the circumference of the skirt.
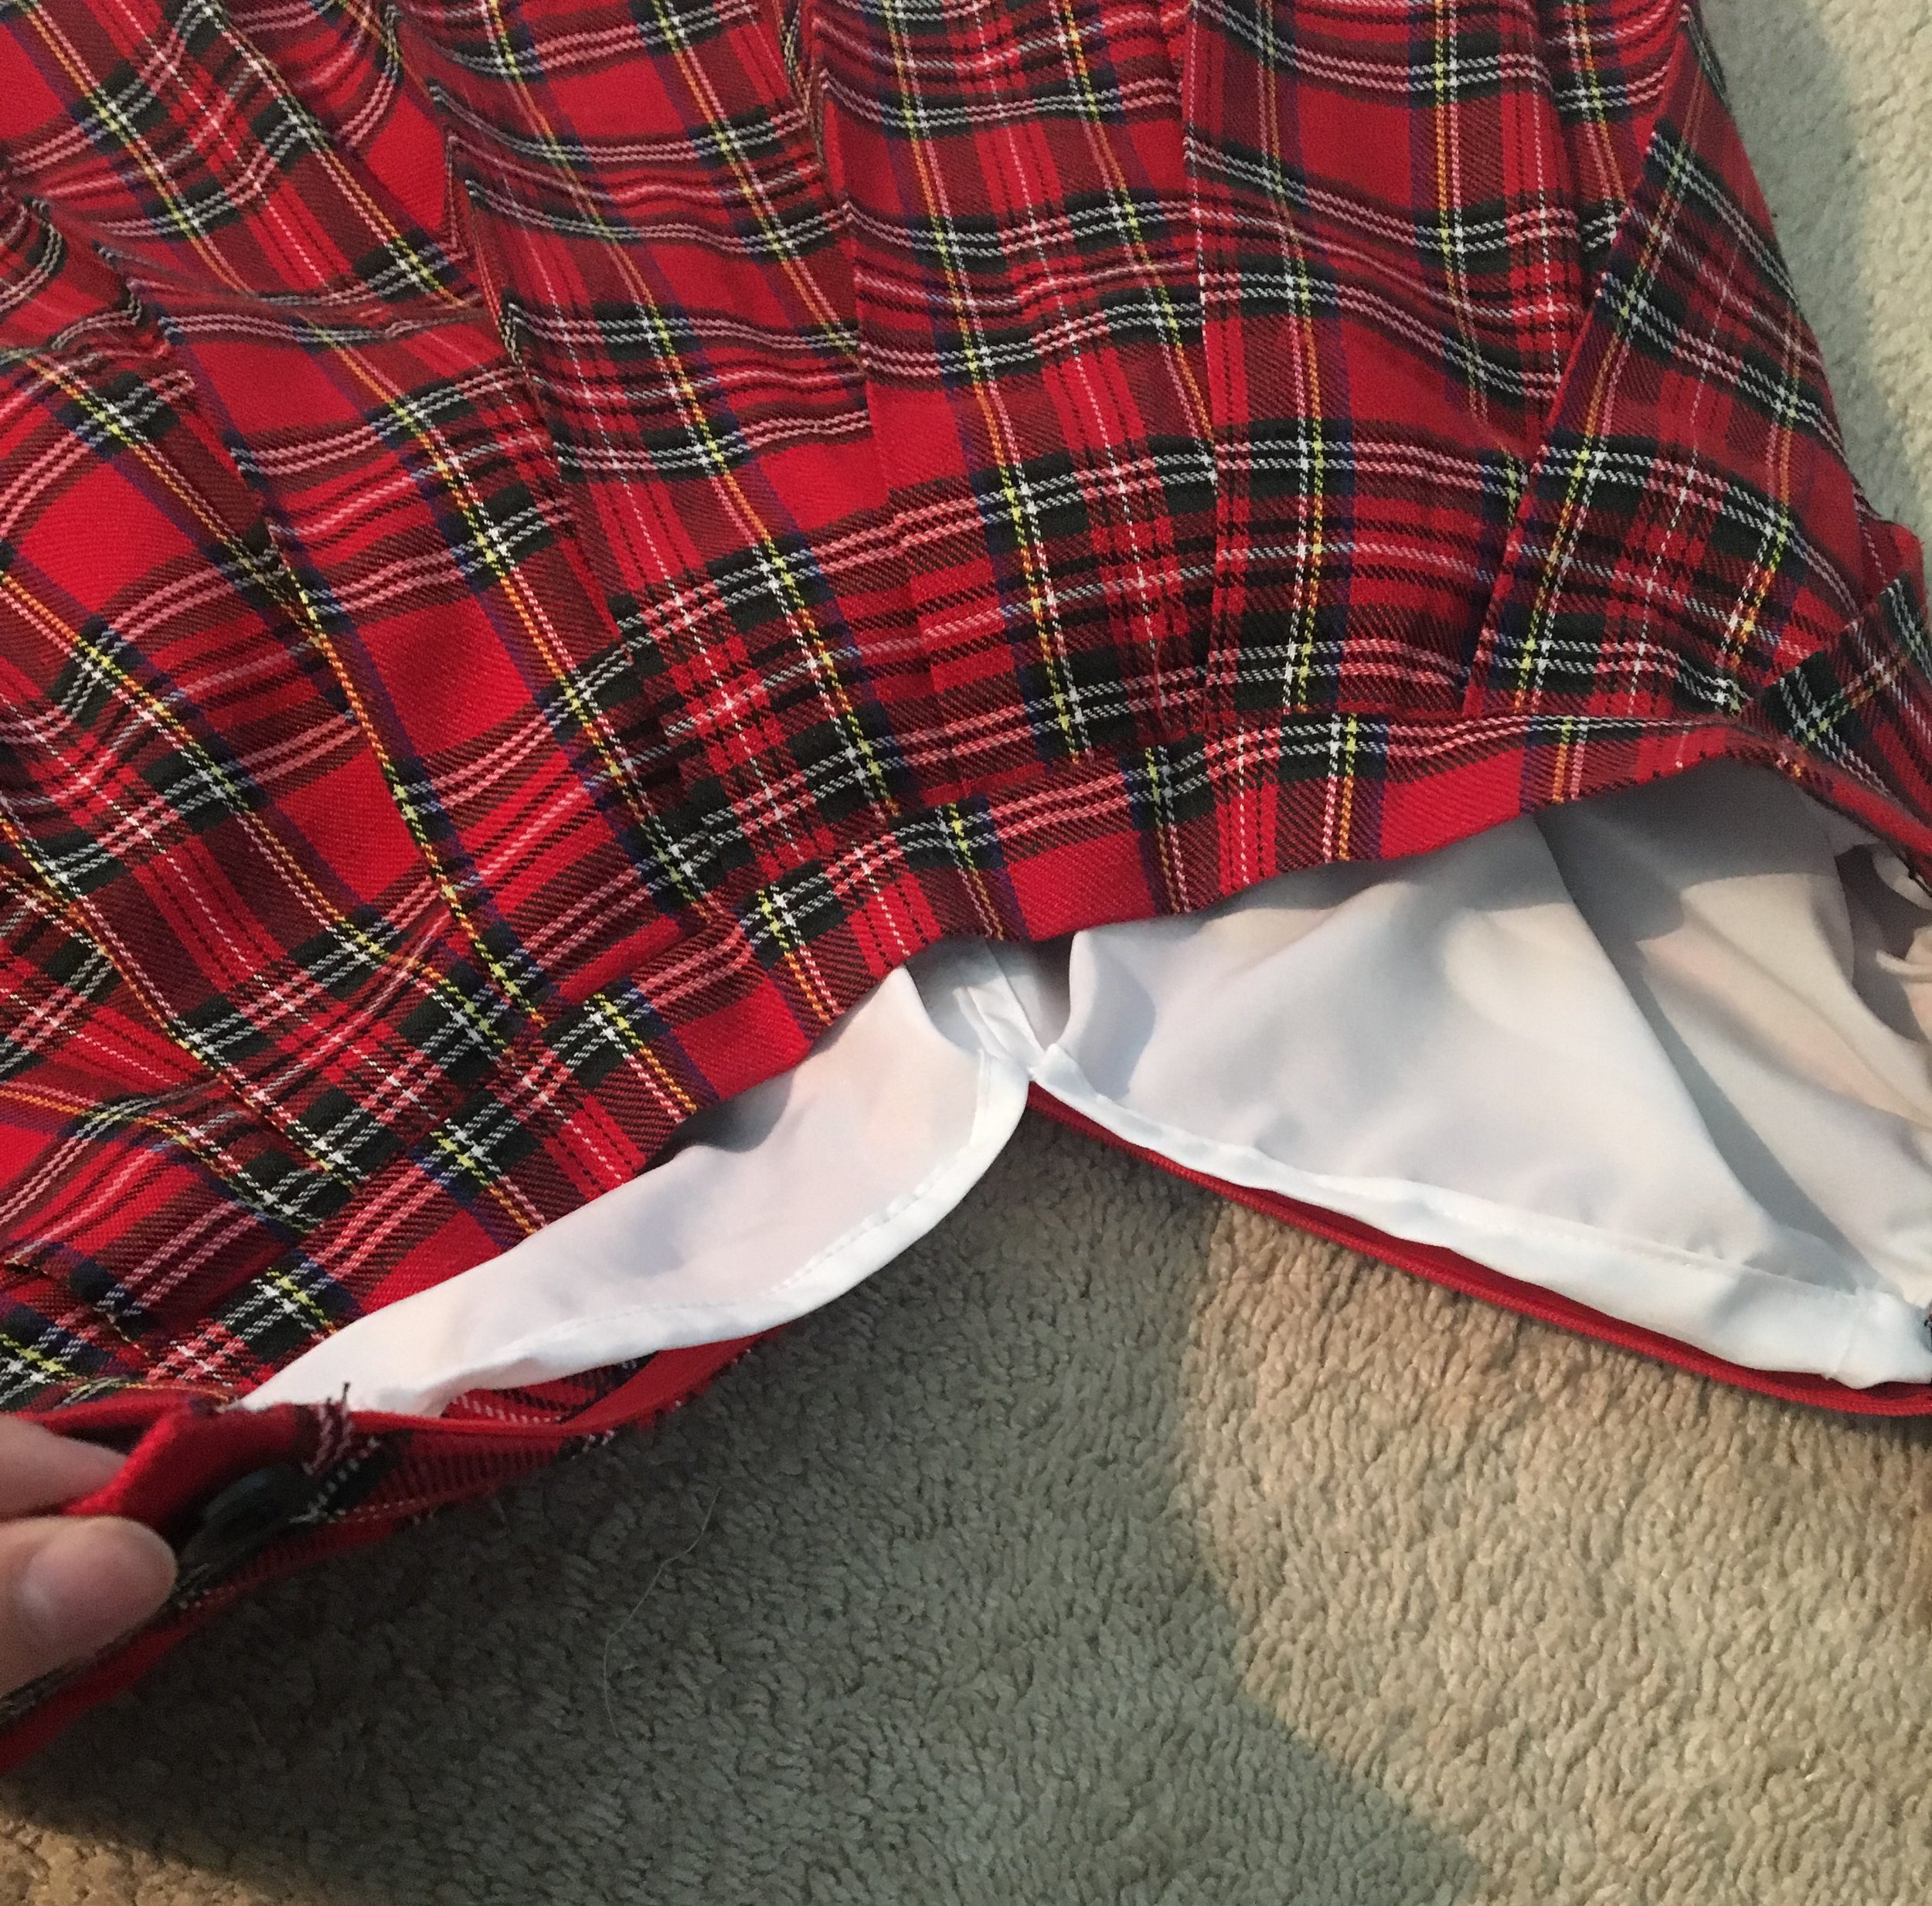
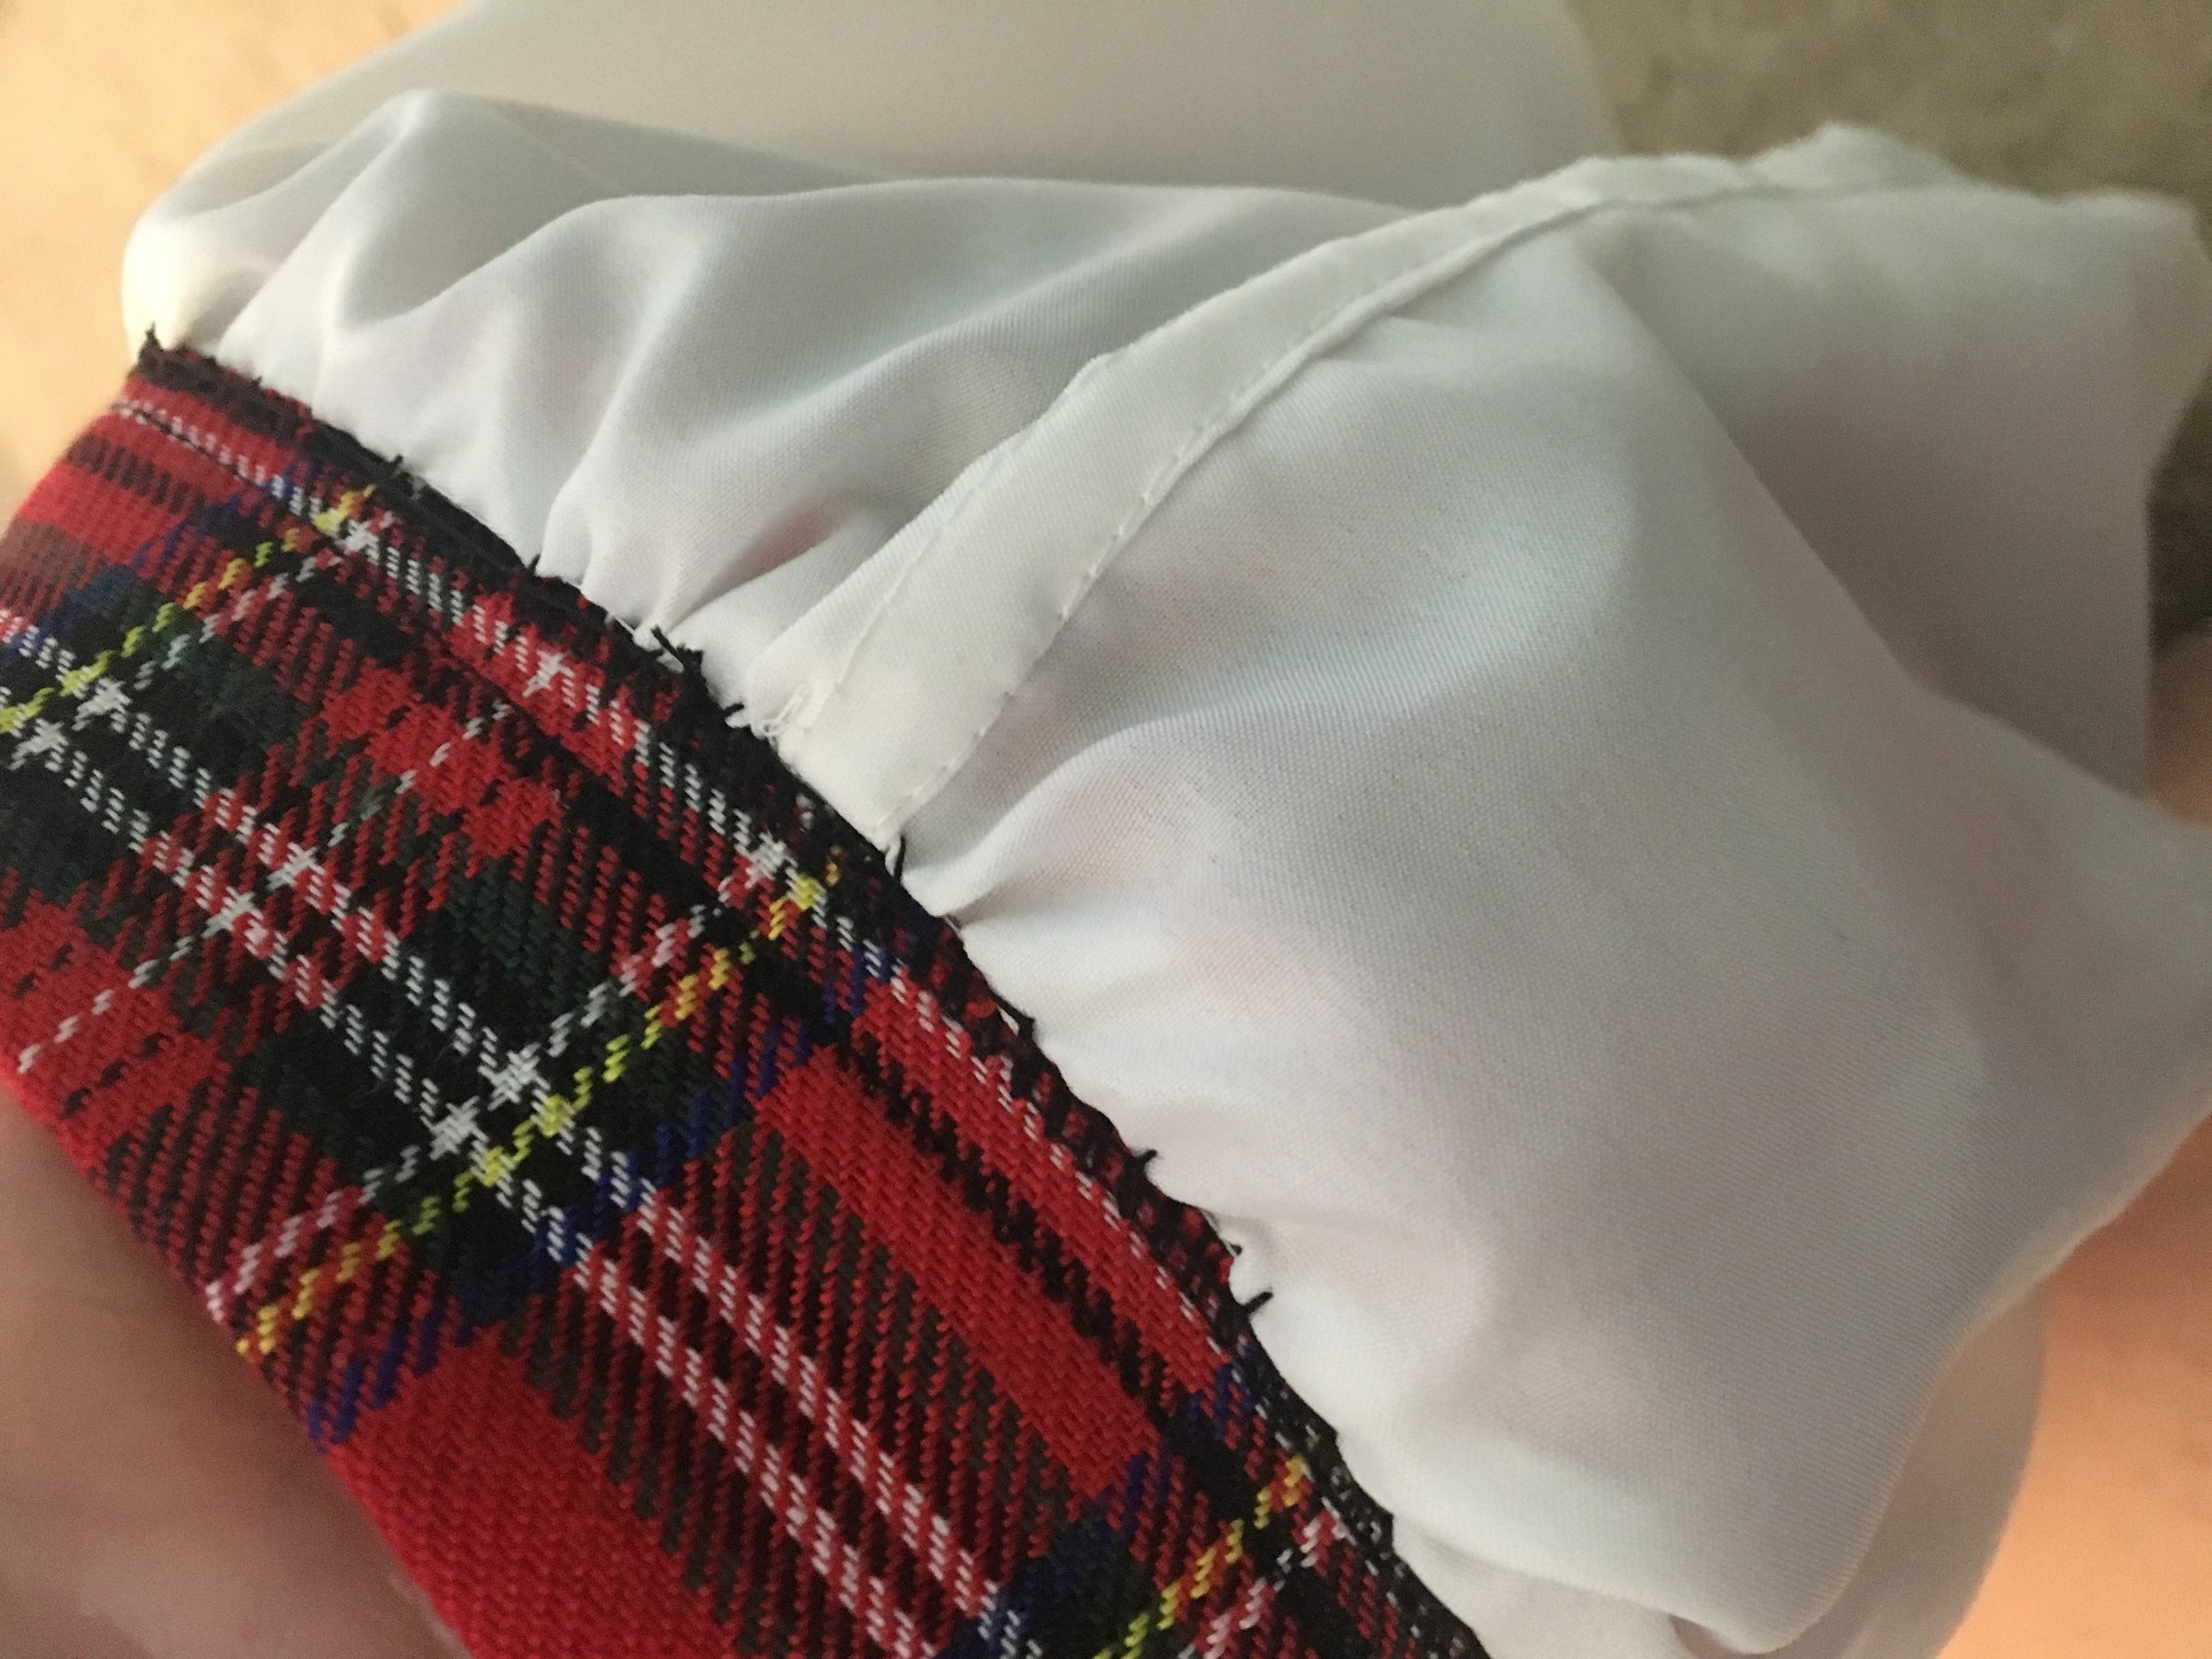
Once you get the lace in... its finally time to prepare to attach the petticoat to the top of the inside of your pleated skirt!
Something you should notice is the waist measurement is HUGE - You need to bring it in with a gather stitch.
I didn't want the thread to be seen on the front of my skirt so I actually handstitched the petticoat in. Essentially was something light a running stitch although I was taking super small threads from the pleated skirt so you couldn't see the thread on the other side. Similar to how slip stitches work.
And of course because lining frays a ton... I used my serger to finish off the seam.

IF YOU DO NOT HAVE A SERGER... You can...
Do a zigzag stitch around the edge.
Use fray check
And BOOM... YOU ARE DONE WITH THE SKIRT!
*if your skirt was like mine.. you may have to open up the button hole a little bit*

BLAZER (Modified)
I started with a blazer I bought off of Amazon. I bought it in a dark brown because I noticed in the show that the women have dark brown blazers while the men have black.
Another thing to notice is that the closure for the women's blazer is technically the wrong way. The button should be on the left for women.. although in the show they have it on the right. If you want to be picky about it.. you can make modifications to your own blazer. Although I didn't change where the button was on mine because I'm a costume junky and it almost kinda bothers me that its on the wrong side in the show xD
For the blazer you are going to start with correcting the shape.
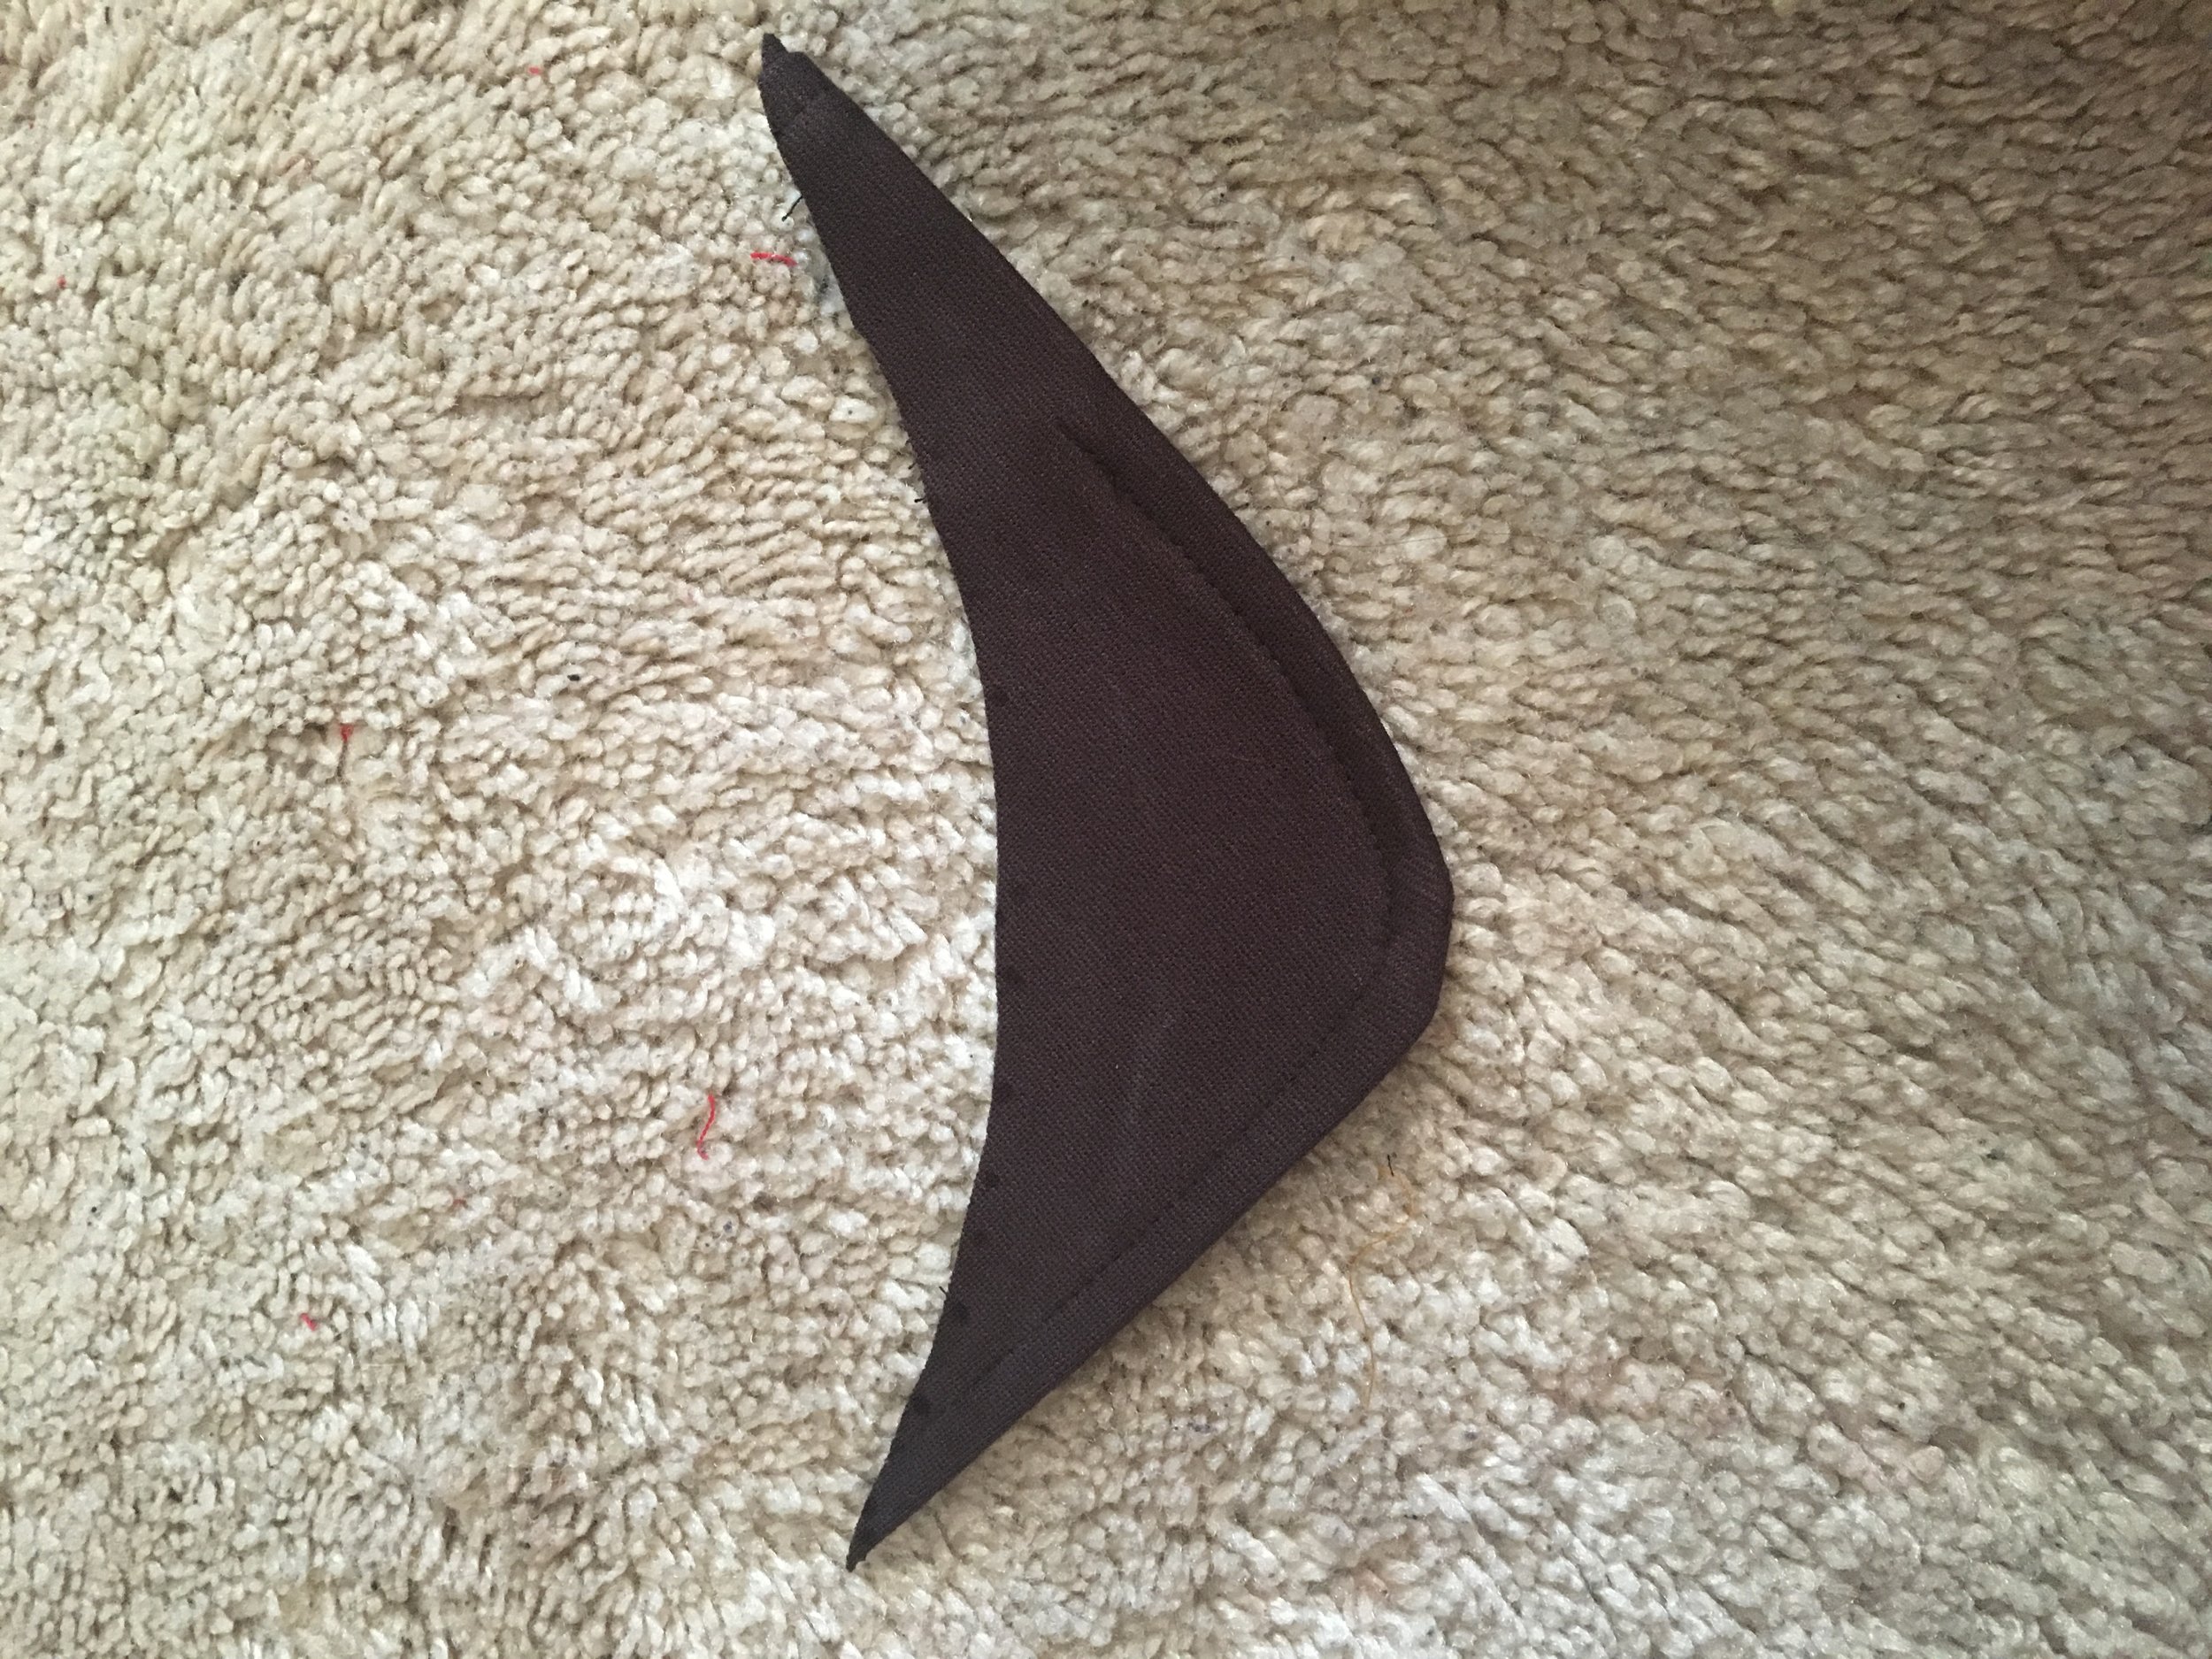
Ironically the shape you are going to cut is what you are going to be using for the pockets. So keep that in mind when you are cutting away at the material.
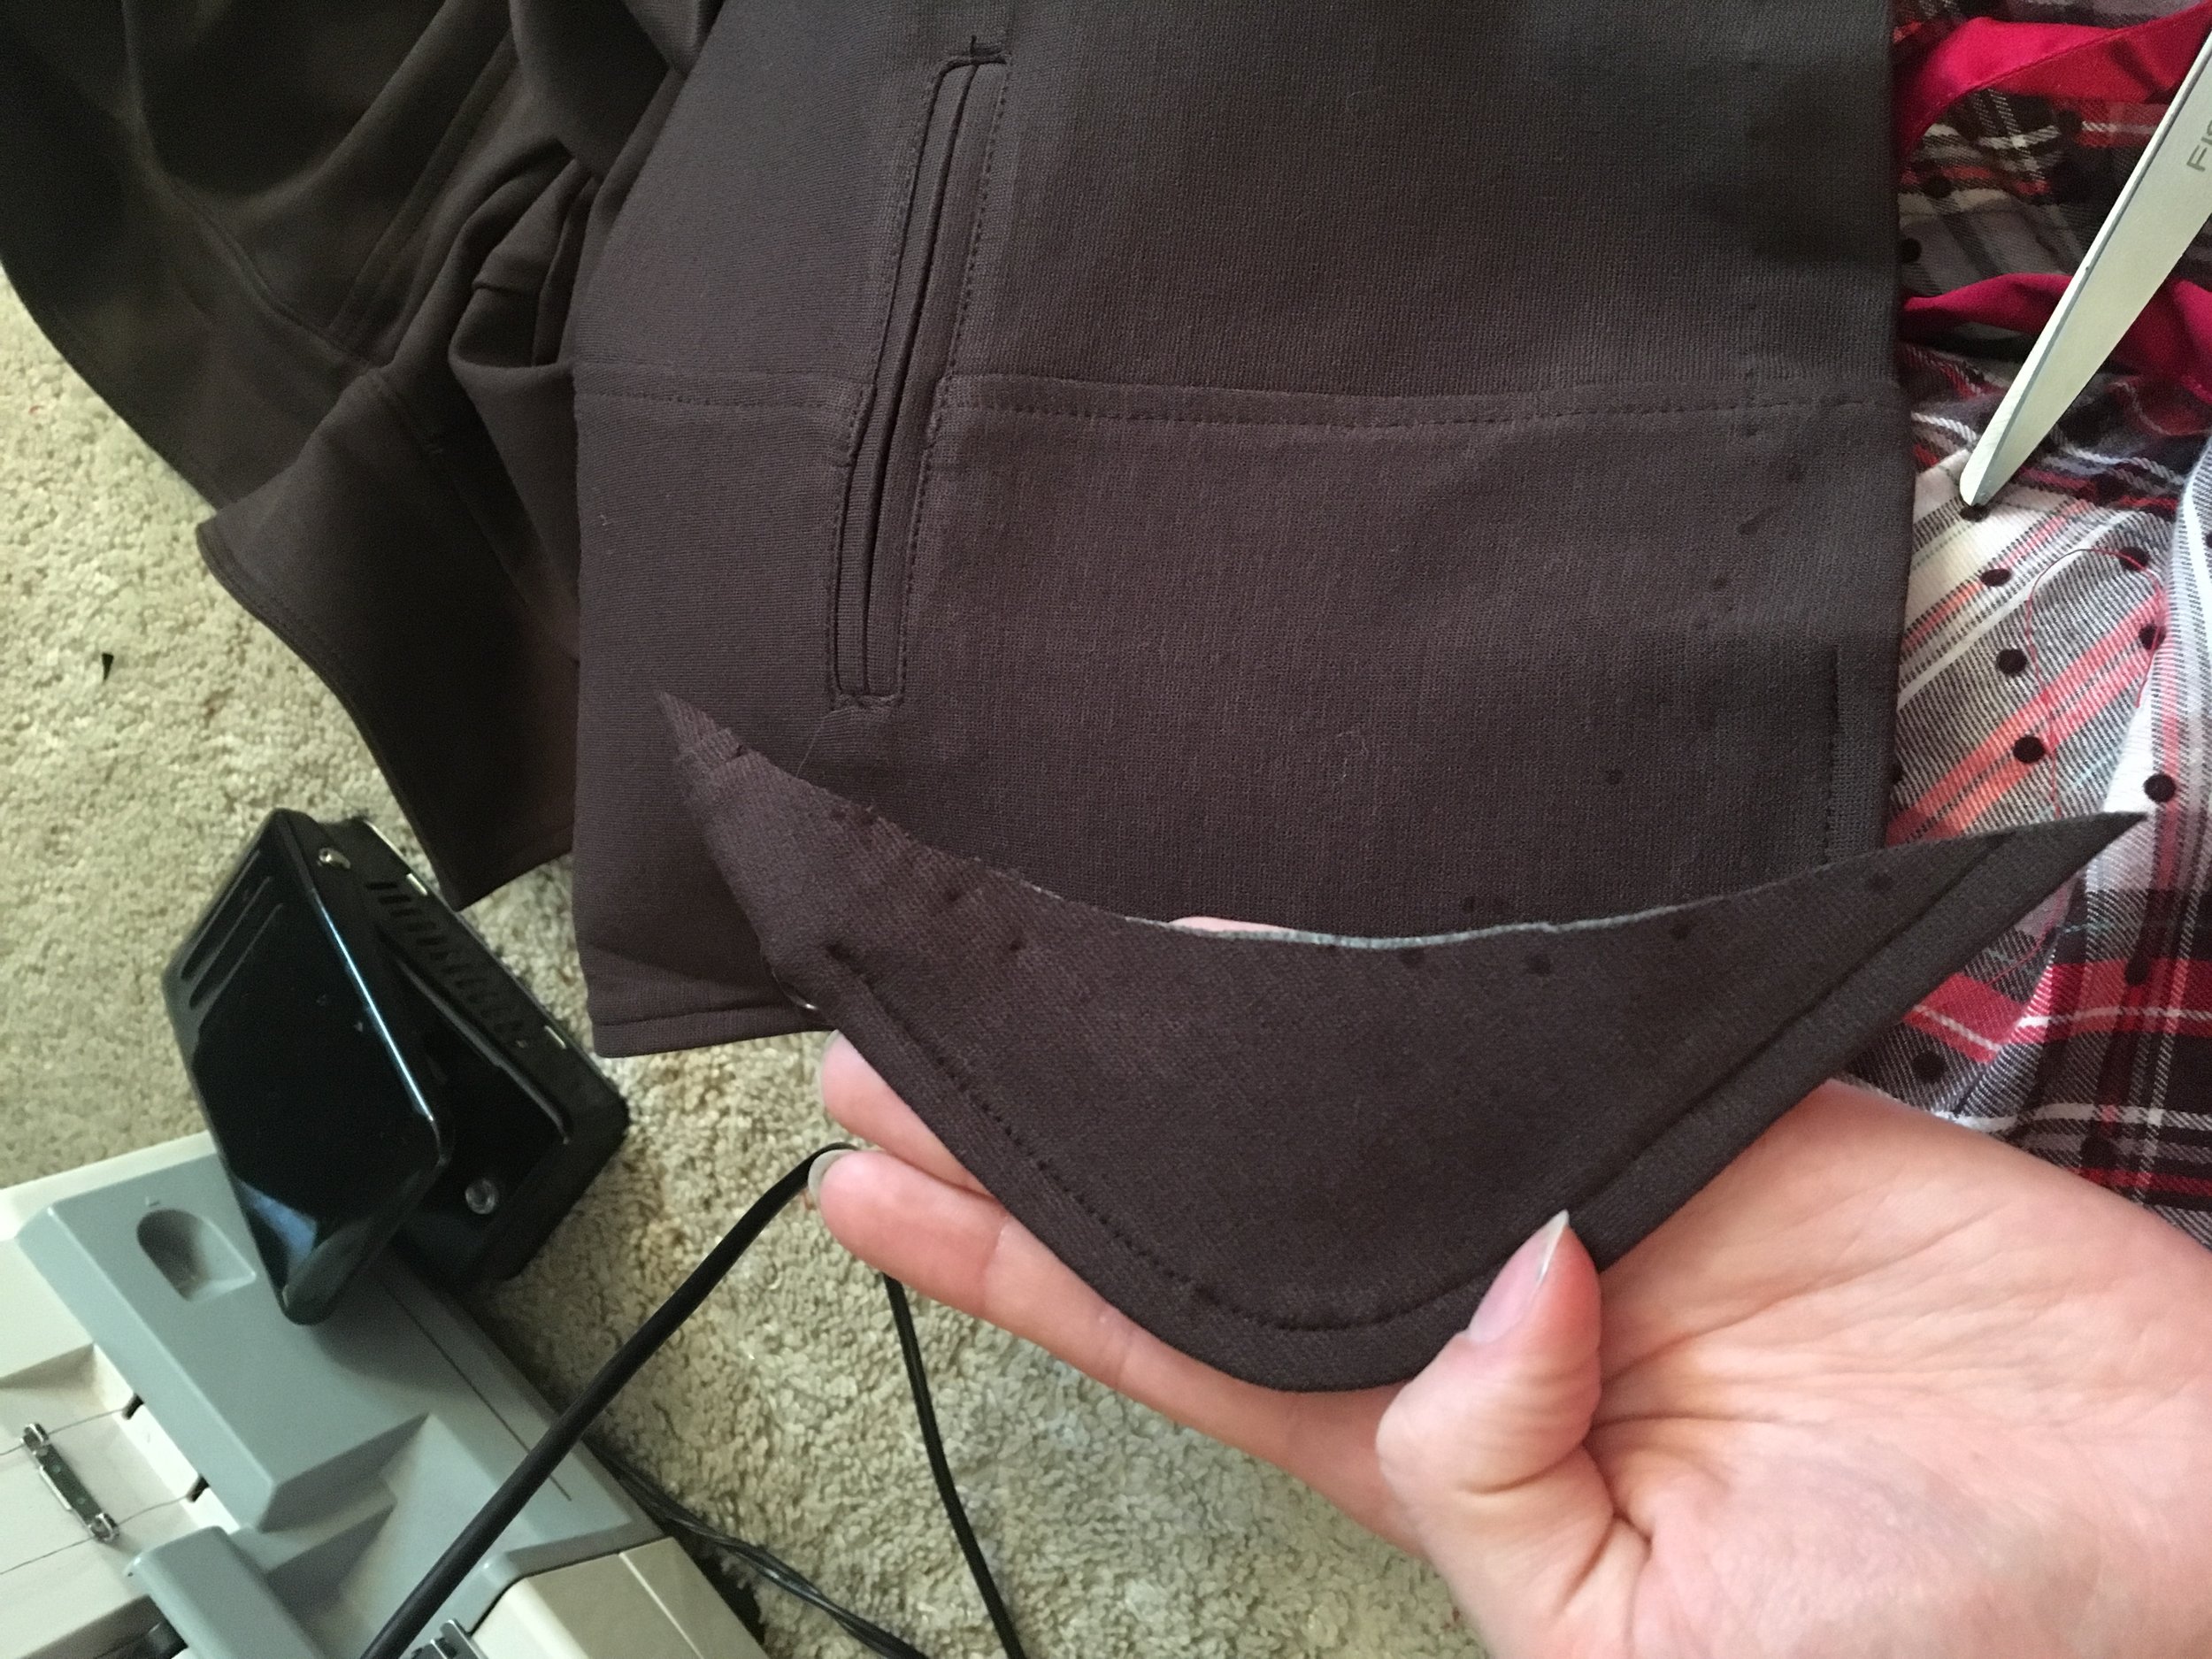
First mark with a marker your shape that you want to cut away from the bottom of your blazer. Mine looked like a rounded triangle with its furthest point away from that curved edge being 2 1/2"
Cut it off both sides! DO NOT THROW IT AWAY! You are using this for the pockets! In fact... lets do the pockets now so you don't accidentally lose them!
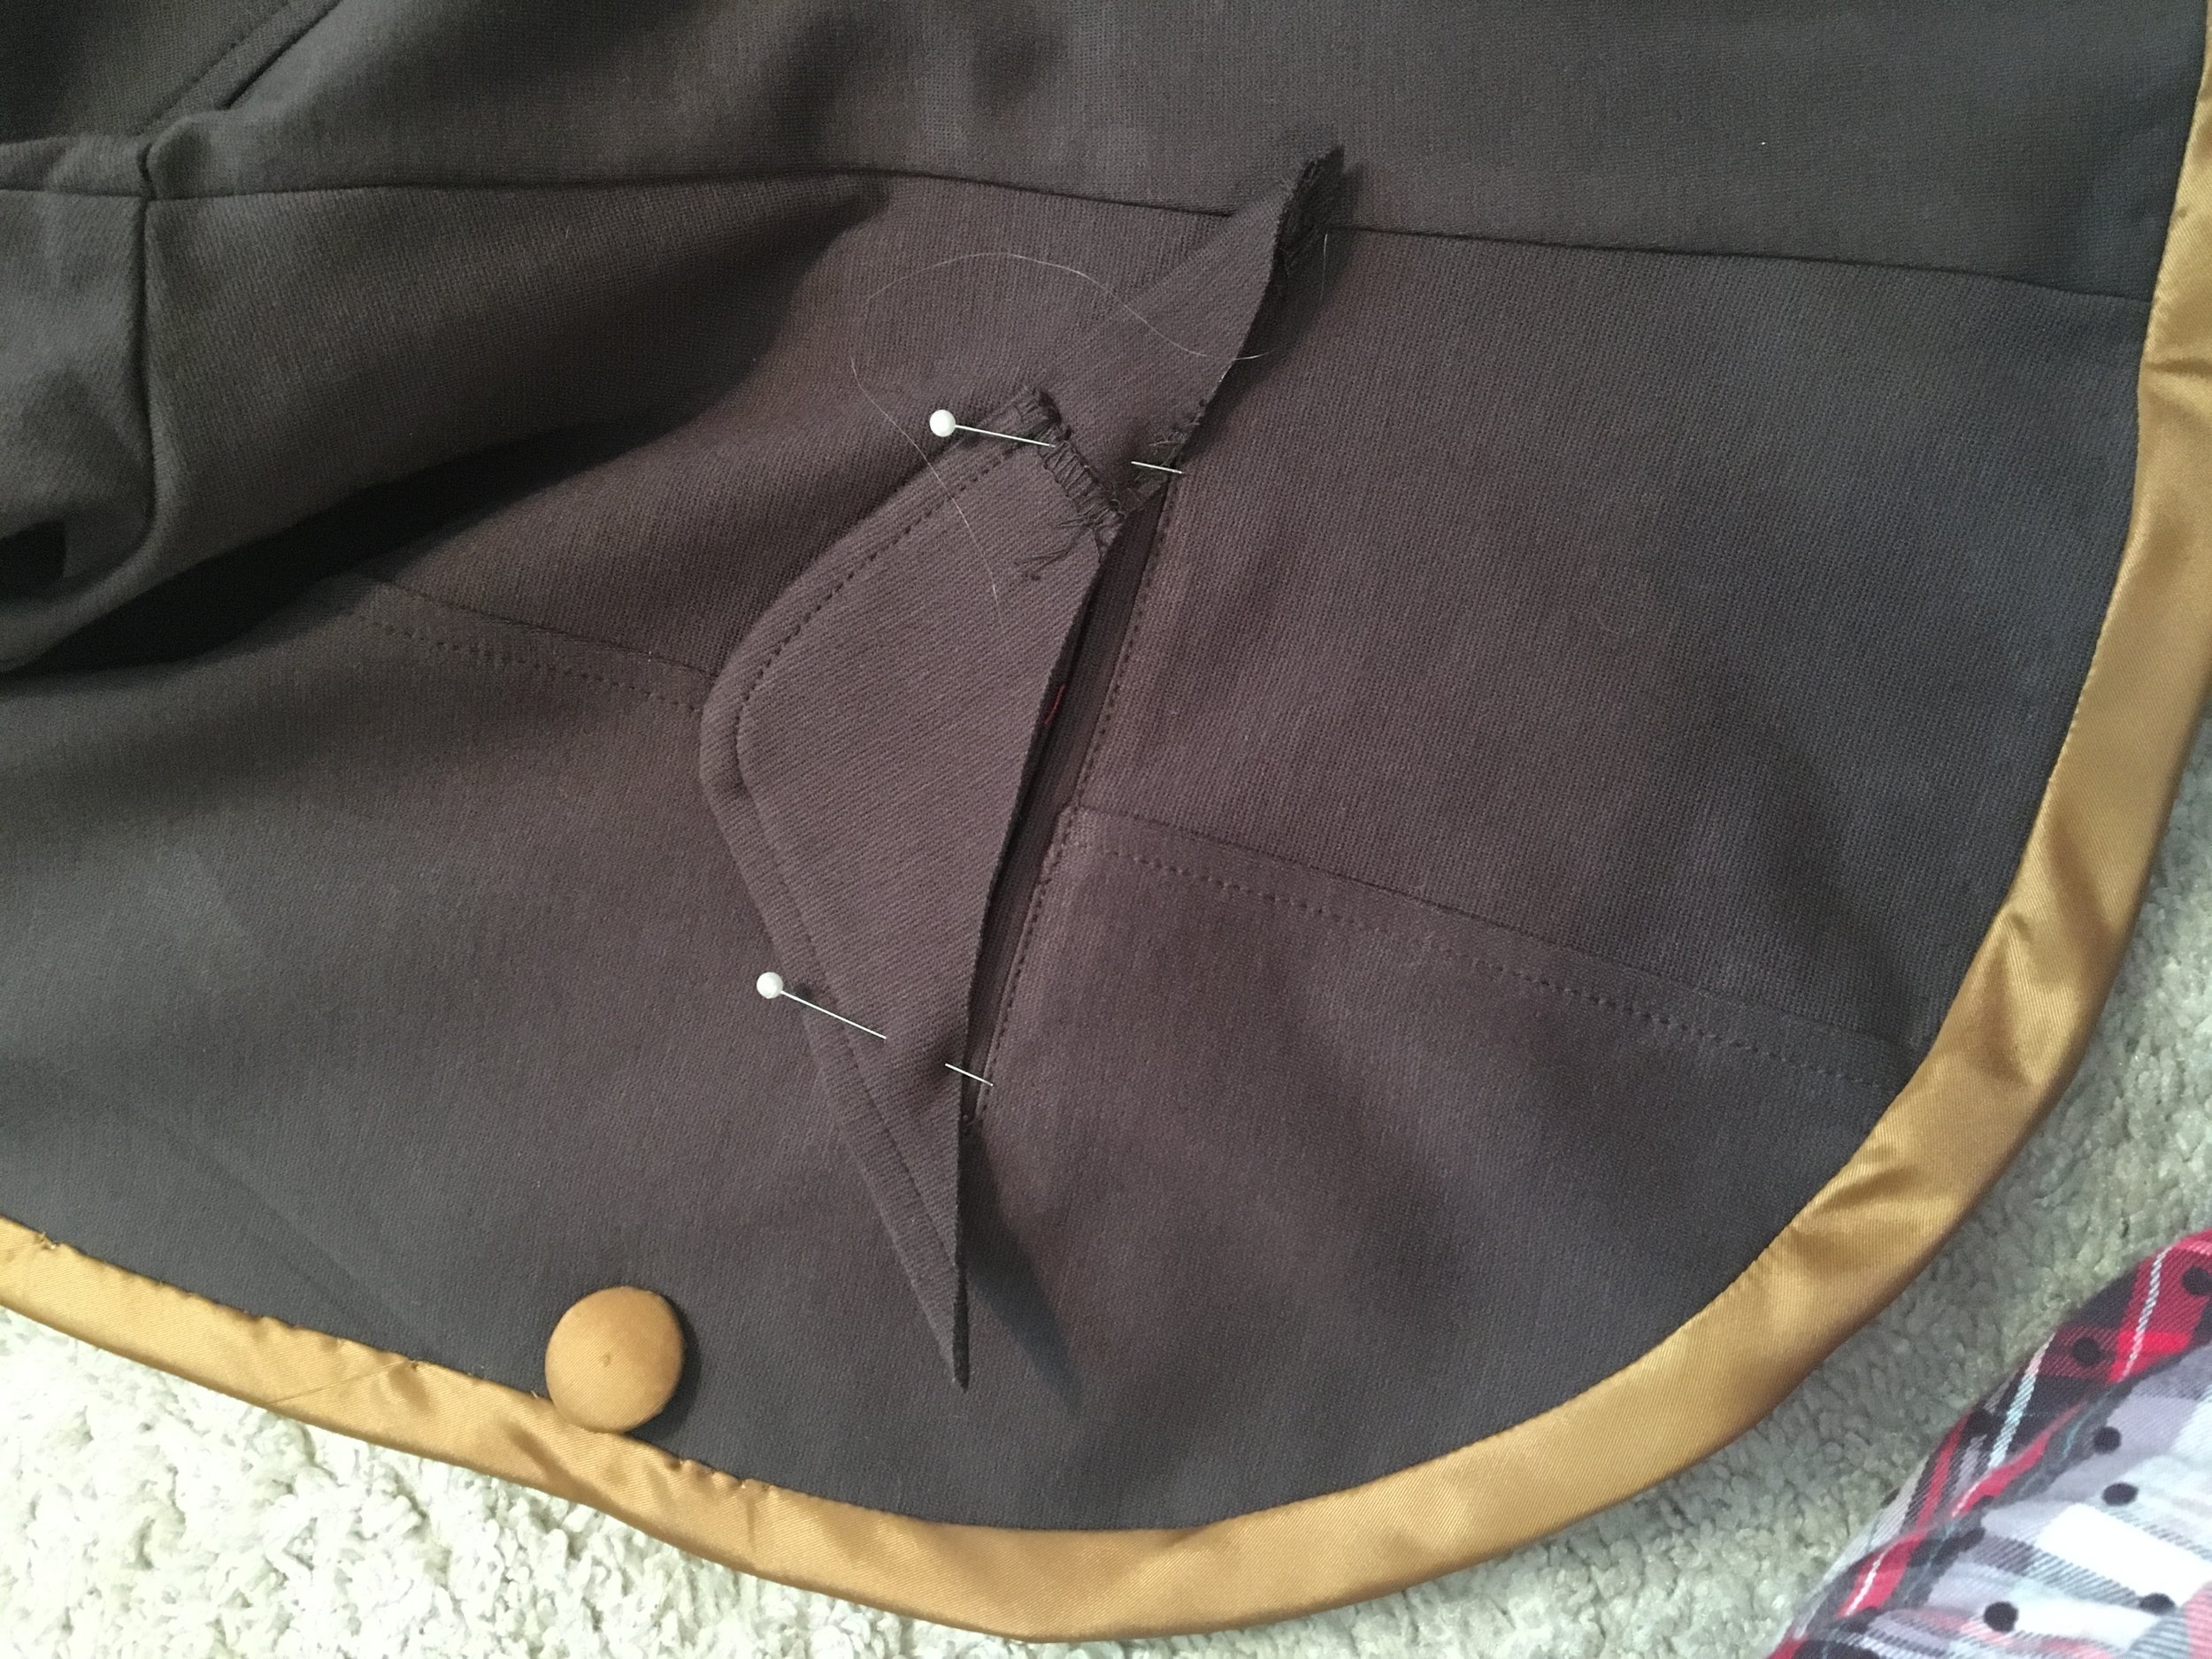
Yes this photo has the gold trim on the blazer... trust me... we are getting there. You didn't miss a step fam!
Your pieces may look like this... so its a little pointy on the sides. Be away you may need to trim those up a bit. Then pin it to the fake pockets that's on the blazer.

Use your sewing machine to sew the flap on.
Then fold the flap down over the fake pocket slit. And hand sew the flap down. Don't forget the button!
Now lets get to the GOLD TRIM!
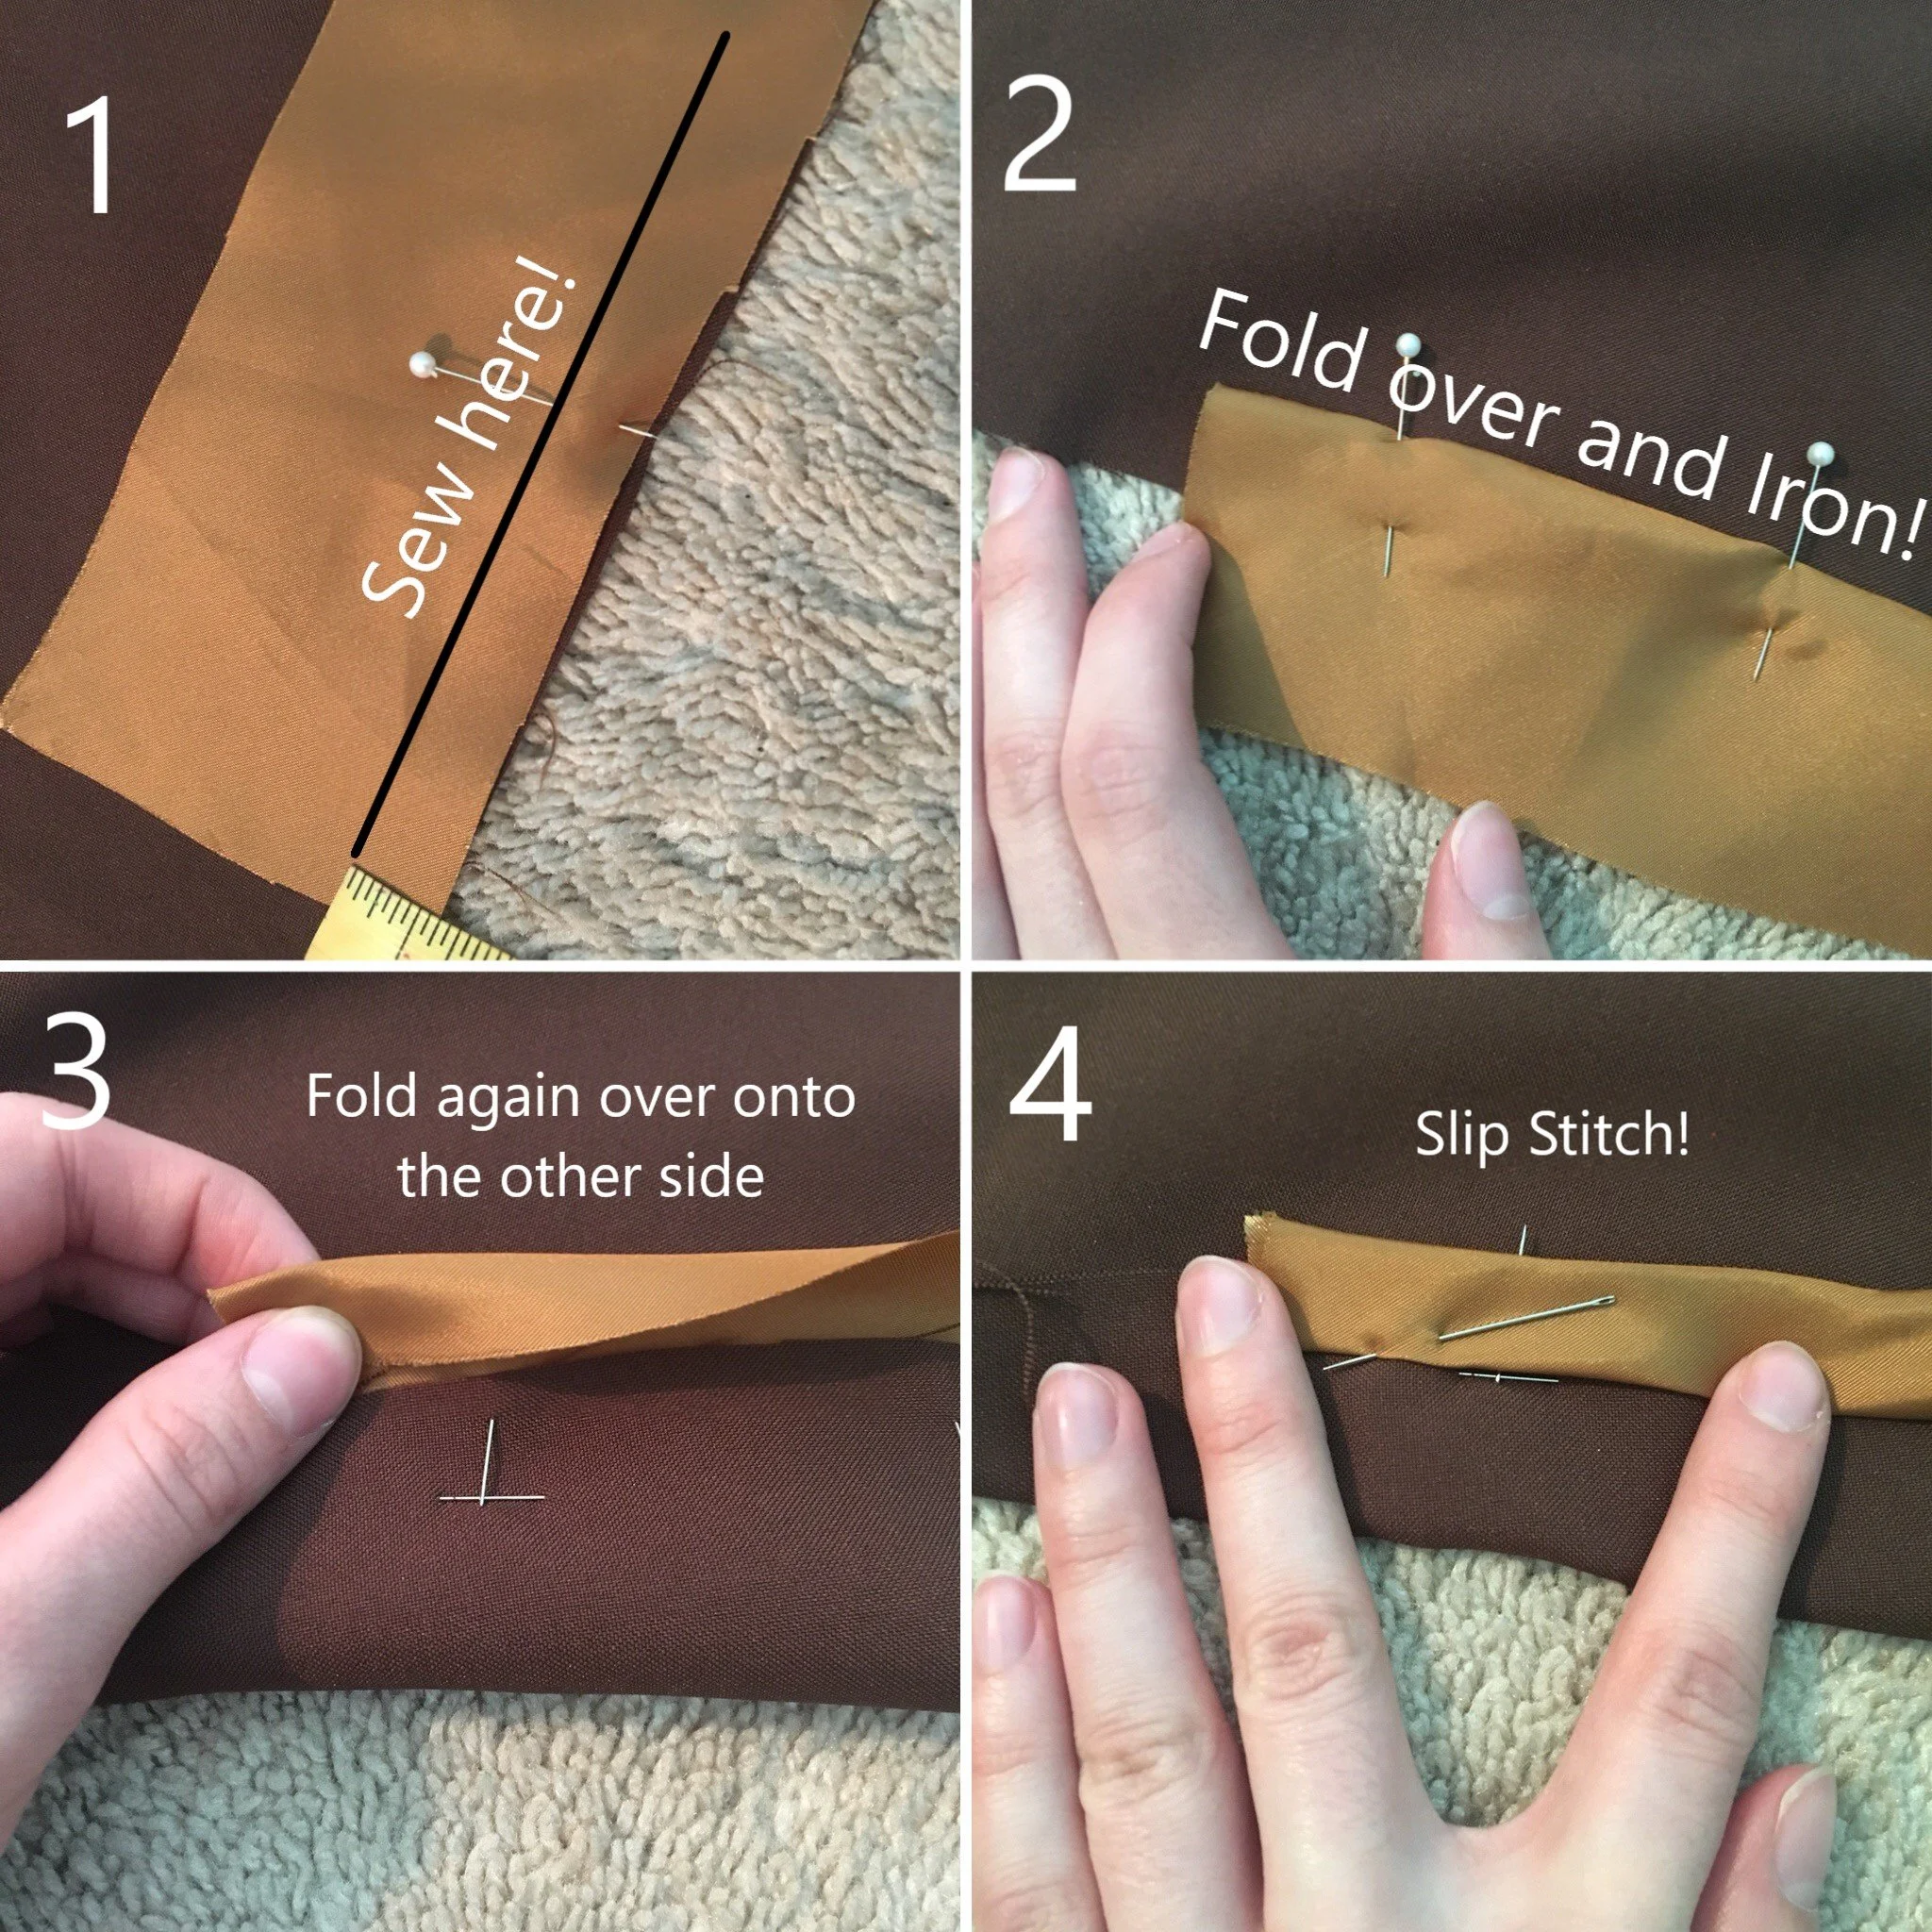
I spent a lot of time looking for fabric and biased tape that would work for the trim. Ended up going with a taffeta from the Yaya Han collection. Unfortunately I had to essentially make my own biased tape.
You will want to cut long pieces of 2.5" inch wide pieces.
Remember with biased tape you want the grain to be on the diagonal. (If you don't know what a grain line is.. refer to THIS).
Follow the photo when sewing on the biased tape.
On right side of the fabric line up the biased tape and the edge of the blazer and sew 1/2" away from the edge.
Fold over and iron your fabric.
Now to do the other side.. we want it to be also 1/2" so fold over your fabric and adjust it so that its 1/2" on the other side as well. Iron.
Do a slip stitch

Do this around the entire edge of the blazer. Although be aware... when you get to the part where the button is you may want to add in that thick interfacing (I just handsewed a small triangle piece in there). Then continue adding the biased tape around it.

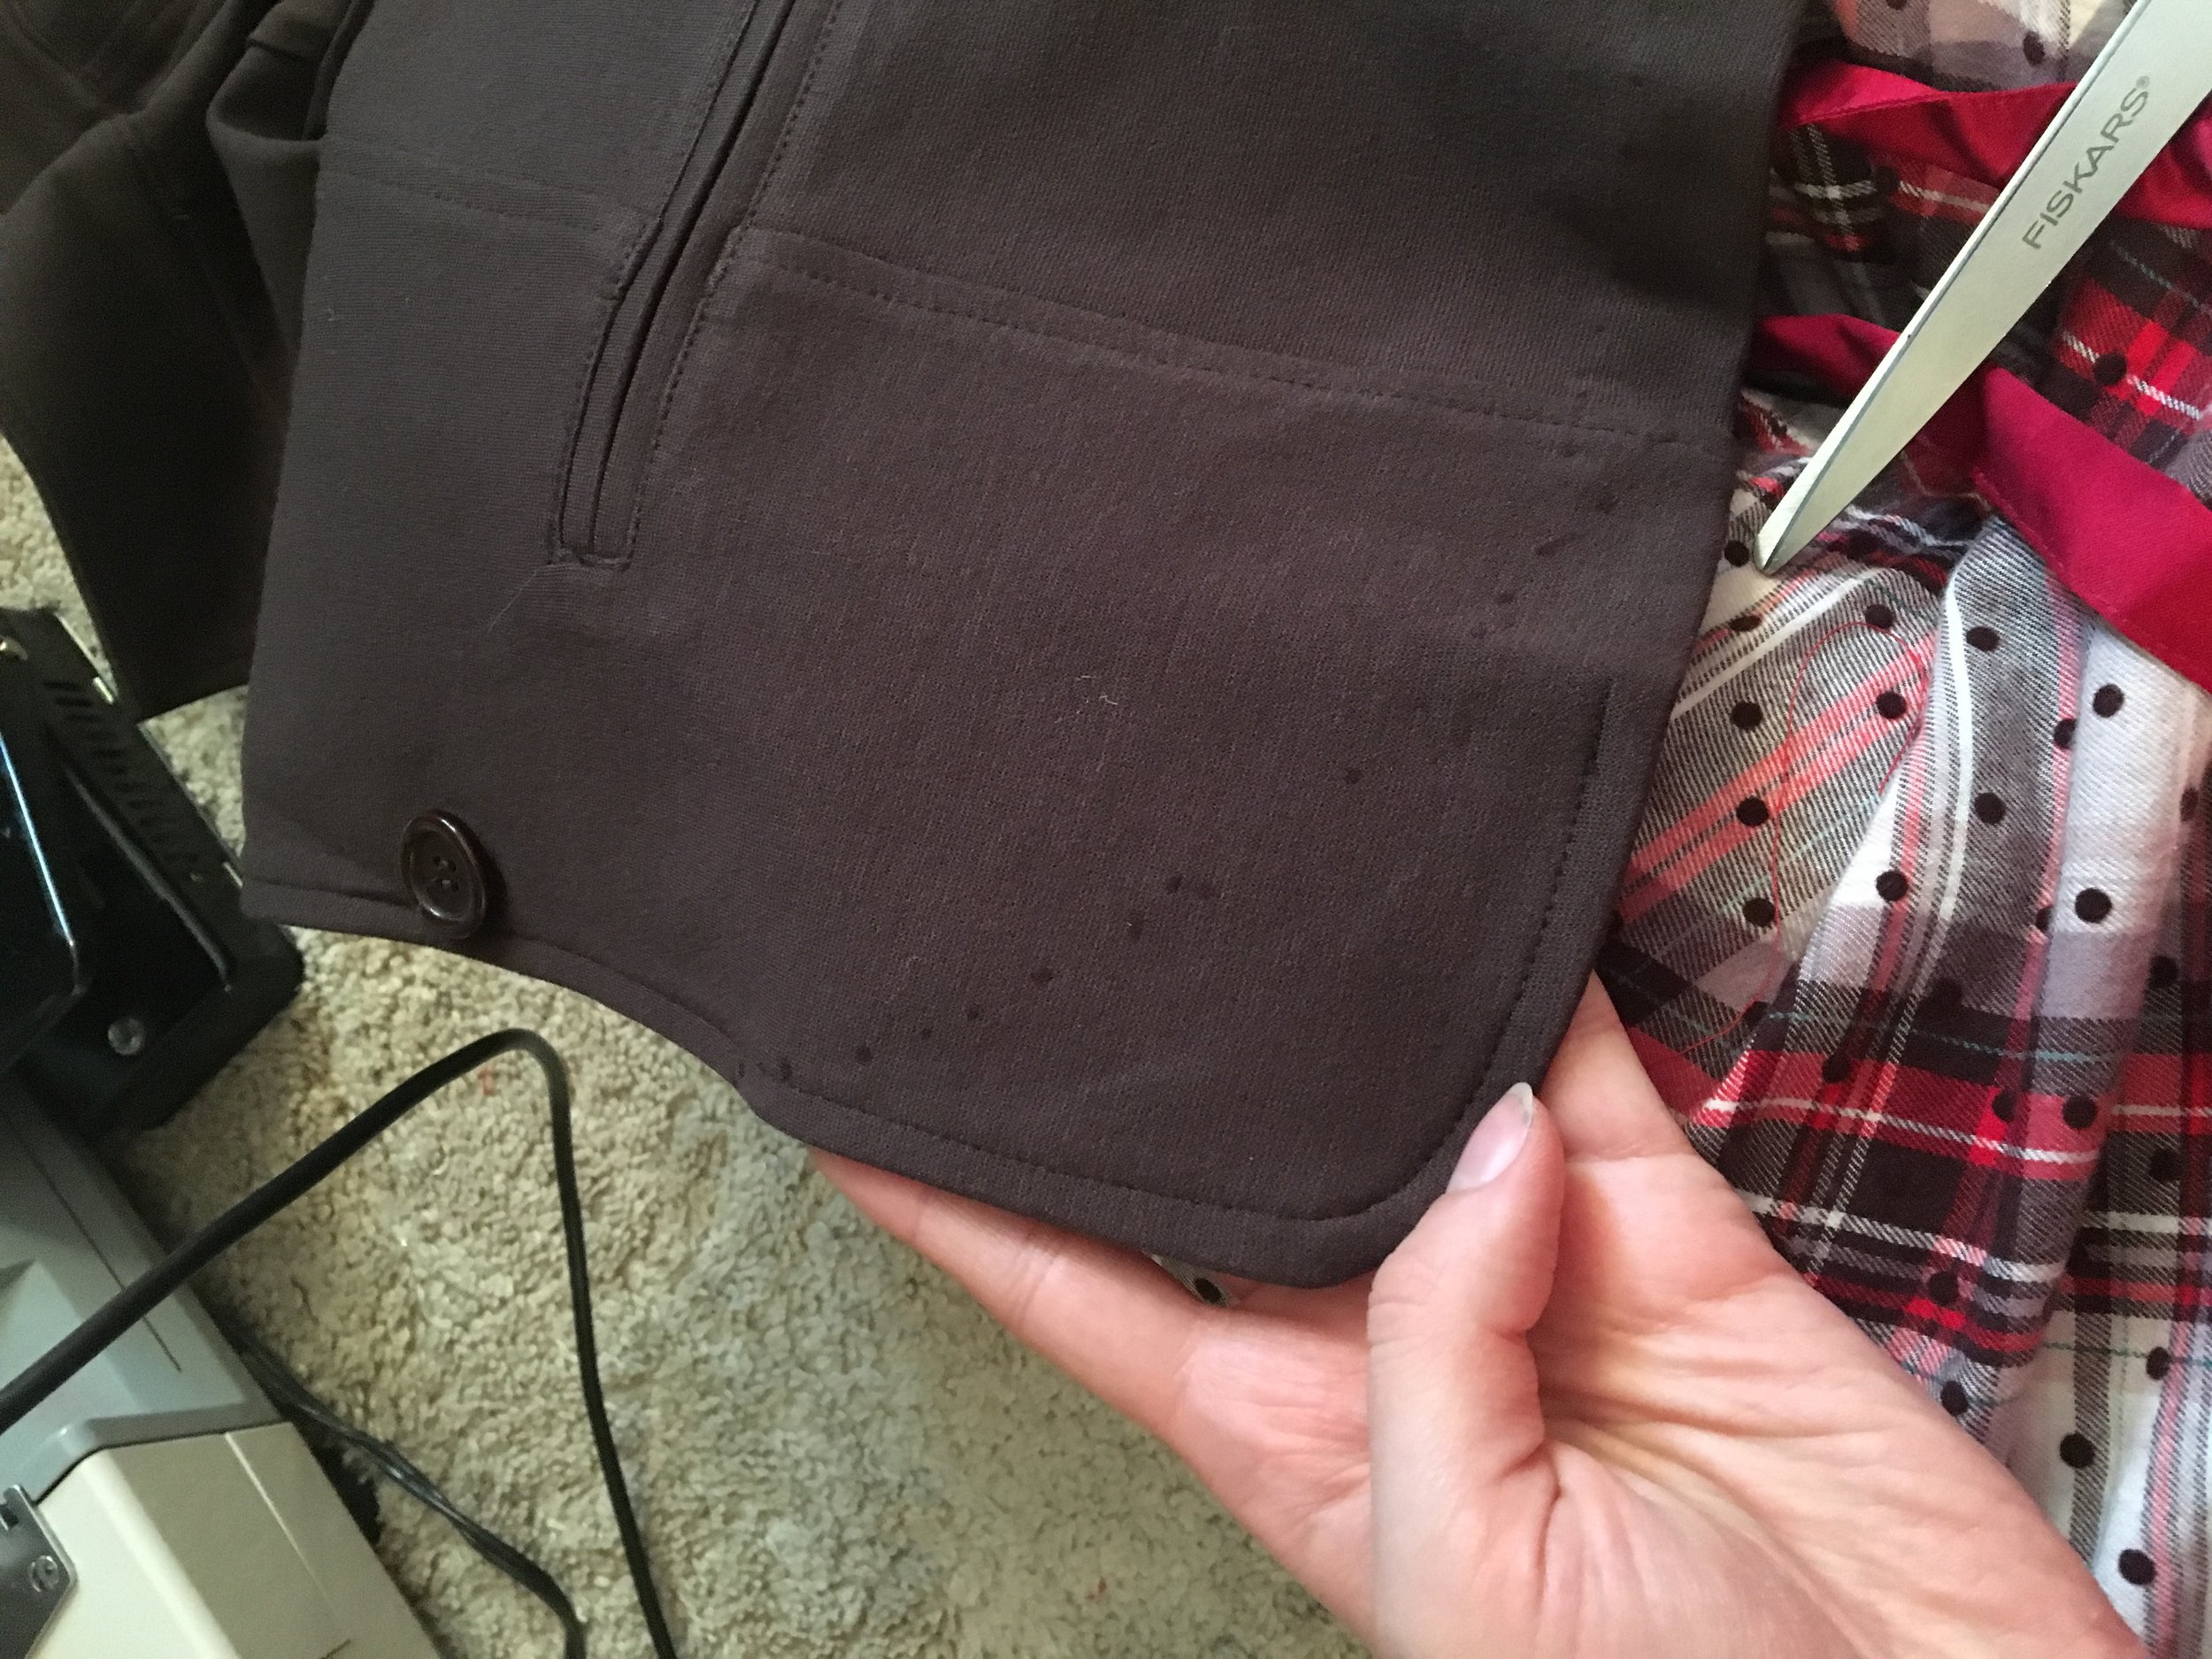
Buttons!
Now that you have the trim on. The final thing to do is to replace the button. I got a button cover set at JoAnns which comes with instructions on how to put the fabric onto the button. Follow what it says. Then replace the main button with your gold one!
AND DONE! Unless if you are cosplaying Ruby then....
CAPE (if you are Ruby or just think capes are cool and essential to life)

So every Ruby cosplay I have ever created.. I ALWAYS use the same pattern. I use
Now this is a full cloak.. we are only going to alter part of the pattern.
The part that is altered is the cape itself (don't worry about changing anything for the hood.
The pattern pieces you will use for the cape is just the back pieces (you should have two). You won't need to use very much from the front pieces. In face I just made a large triangle that sewed up at the top so I can connect the hood to the cape.
Something to keep in mind when making the cape. Notice the shape. The ends are longer than the middle. What I did was I had the very back be 33" long then I had it flow out to 42" long on the sides.
When you figure out the measurements - start cutting and don't forget to finish your seams!
I used a thin biased tape for mine but you can also do fray check if you are not that comfortable with biased tape.
AND YOU ARE DONE! Go get a giant cookie! Because you deserve it!
If you have any questions please let us know! Also if this tutorial helped you then please share your work with us! We would love to see your work (and potentially do a story feature for you at some point ;D )
